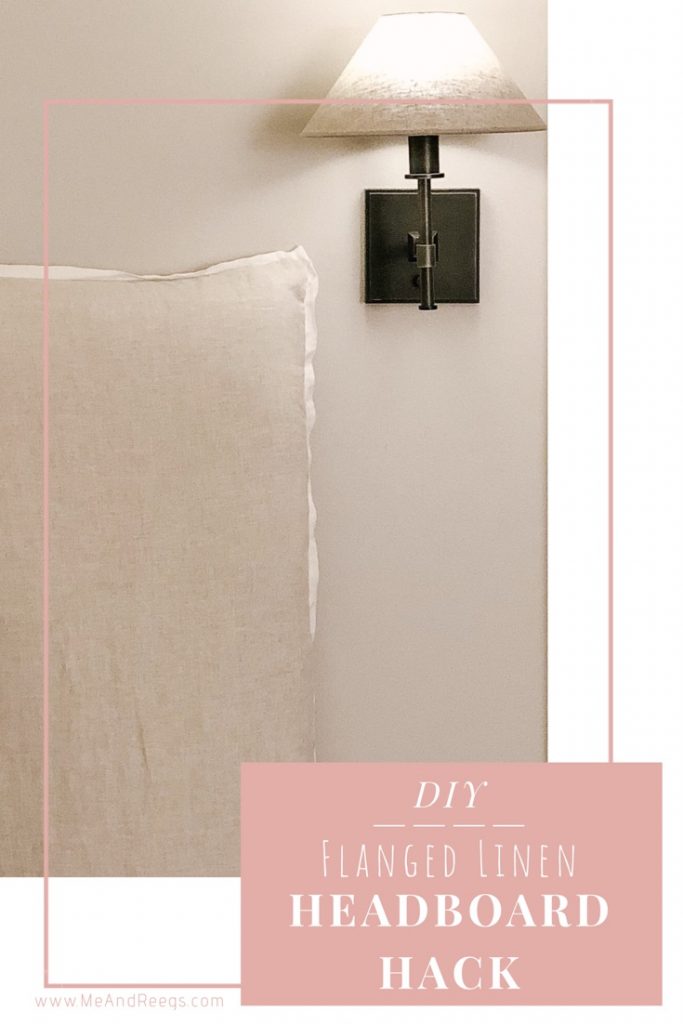
This Belgian Flax Linen headboard hack was a brainchild of mine. I kept seeing these gorgeous master bedroom headboards on Pinterest and Instagram that were wider than the bed and went to the floor. Then I’d follow the click trails to find out they were incredibly expensive. I kept wondering, how can I make this? It can’t be THAT hard.

There were a few cost friendly options that were not as stately, but this was for our master. I really wanted it to be a statement piece. Plus, I was 37 weeks pregnant and I had ideas.
Sure, I kept seeing headboard DIY’s that suggested to simply fold fabric around a board, like we did when upholstering our fireplace bench. Some even suggested tufting it with buttons.
I wasn’t in love with either option.
It was the edges driving me nuts. I wanted that flanged edge on it.
And then one day I saw a euro pillow and thought THAT’S IT!
I headed to the Pottery Barn outlet in Dawsonville, GA (if you haven’t been, GO! There’s a Restoration Hardware Outlet across the street) and found this Belgian Flax Linen duvet cover for under $100. There was a sale and I just happened to luck out.
I grabbed a few matching euro pillow covers and headed home to torture Jeff with my brilliance.
__________
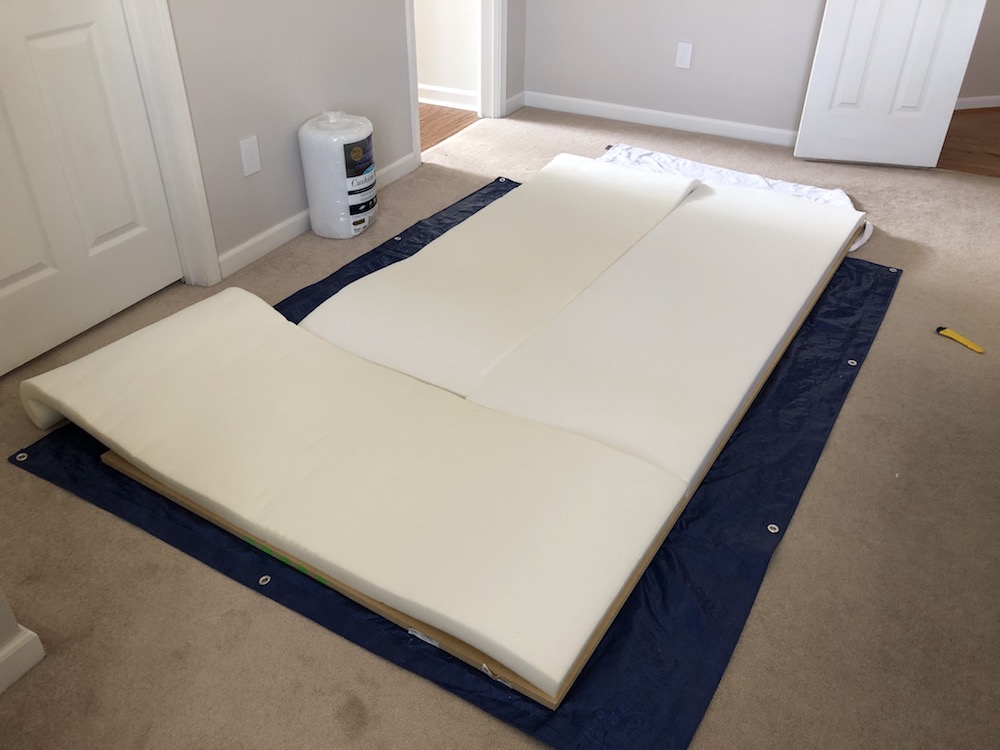
Using a 4×8 sheet of plywood, 2” High Density foam, and batting I created a padded base and then slipcovered it with my duvet cover.
I did have to cut the back of the duvet and add two folds down the center to get it just right, but this option gave me the gorgeous flanged edging I was looking for.
For our king sized bed, I used a 4×8 sheet of plywood and a king sized duvet cover.
__________
Supplies
__________
For the Headboard:
- 4×8 3/4″ plywood
- 2″ High Density Foam
- Batting of Choice
- King Sized Duvet Cover of Choice
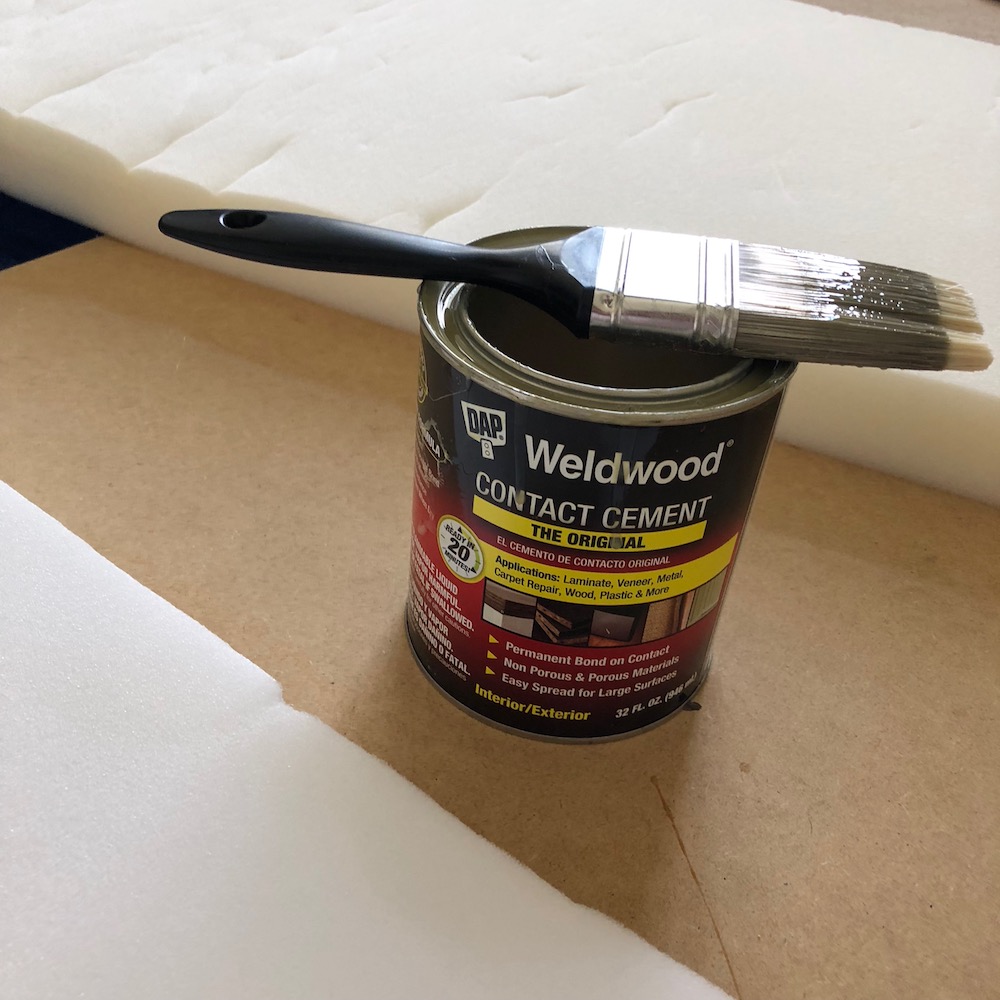
- Weldwood Contact Cement
- Staple Gun
- Scissors to cut foam, batting, and duvet
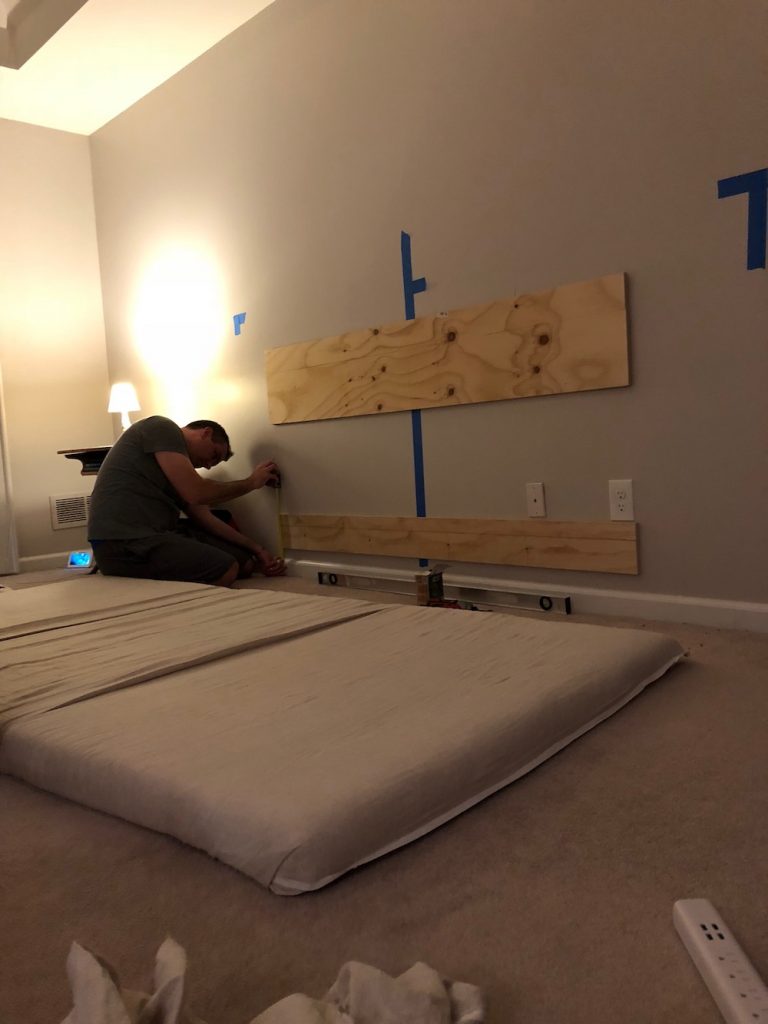
For the French Cleat Info CLICK HERE to see our DIY video!
For the French Cleat we used 2 pieces of 3/4″ plywood and 1.5″ screws.
__________
How To:
(See the VIDEO of me doing it live on IGTV HERE!)
__________
Lay the plywood flat on the ground face up.
We used 3/4″ MDF which may have been overkill. 1/2″ probably would have been sufficient.
Lay out the 3” foam rolls to fit.
Piece by piece pick the foam up to apply contact cement on the plywood to adhere the foam. It will dry incredibly quickly. Go portion by portion.
Once all of the foam is glued to the plywood, cut the extra foam off with a sharp razor or quality scissors. The batting will cover some mistakes. I left a little extra foam on so that the plywood edges were covered and not sharp edges. The batting will fold it down.
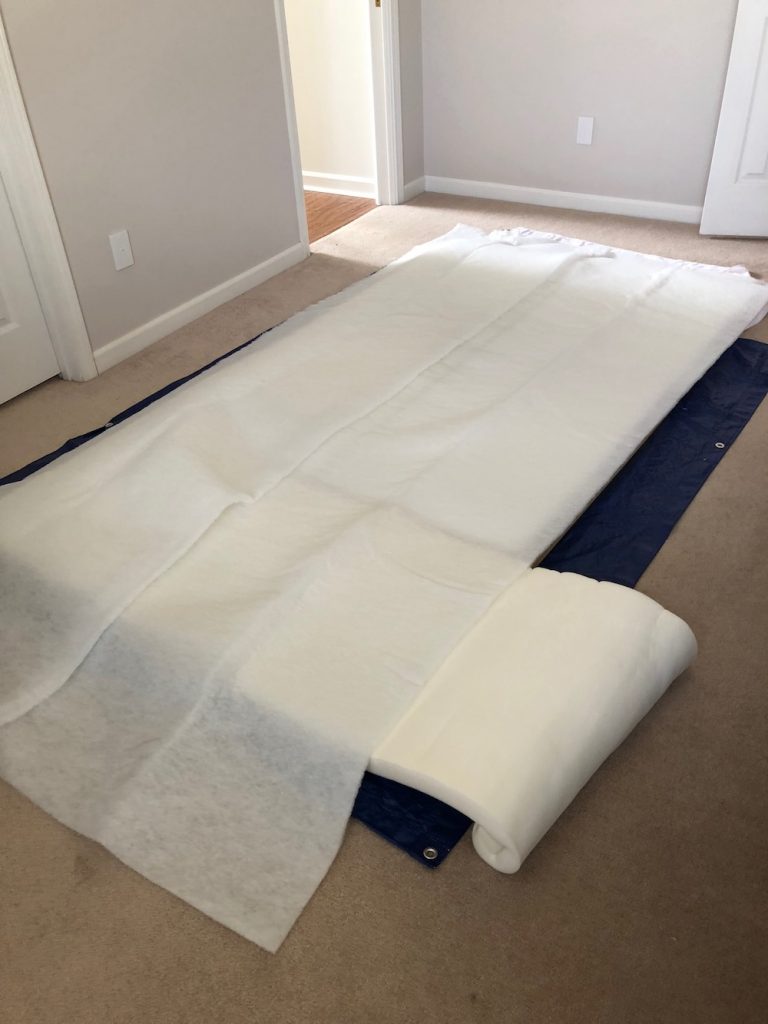
Lay out the batting horizontally so that the seams of the batting will not show underneath the duvet cover. Belgian Flax Linen is pretty thin. You can use the batting of your choice, that is cost effective. This is just to smooth everything out. Like Spanx for your headboard.
Leave a few inches hanging off of the edges so you have room too fold and staple gun the batting down, pulling everything tight. This will give the polished look.
Line the center seems with glue dots to keep the batting in place.
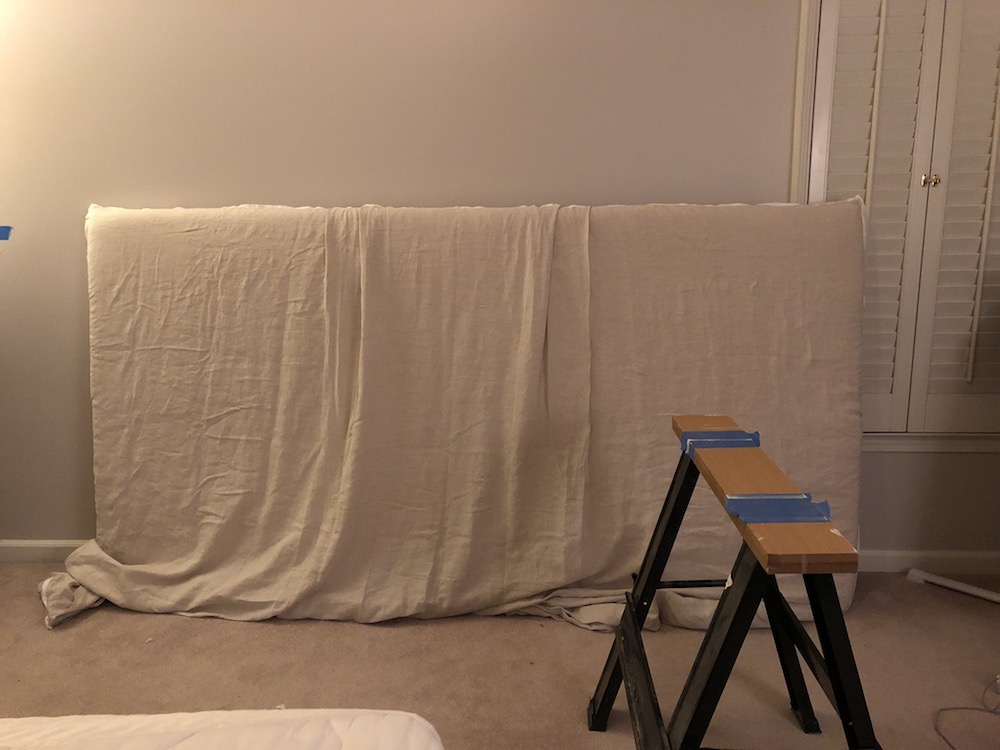
Once the batting is secured, stand the padded base up against a wall.
It will be heavy.
Slide the duvet cover over the 4×8 padded base.
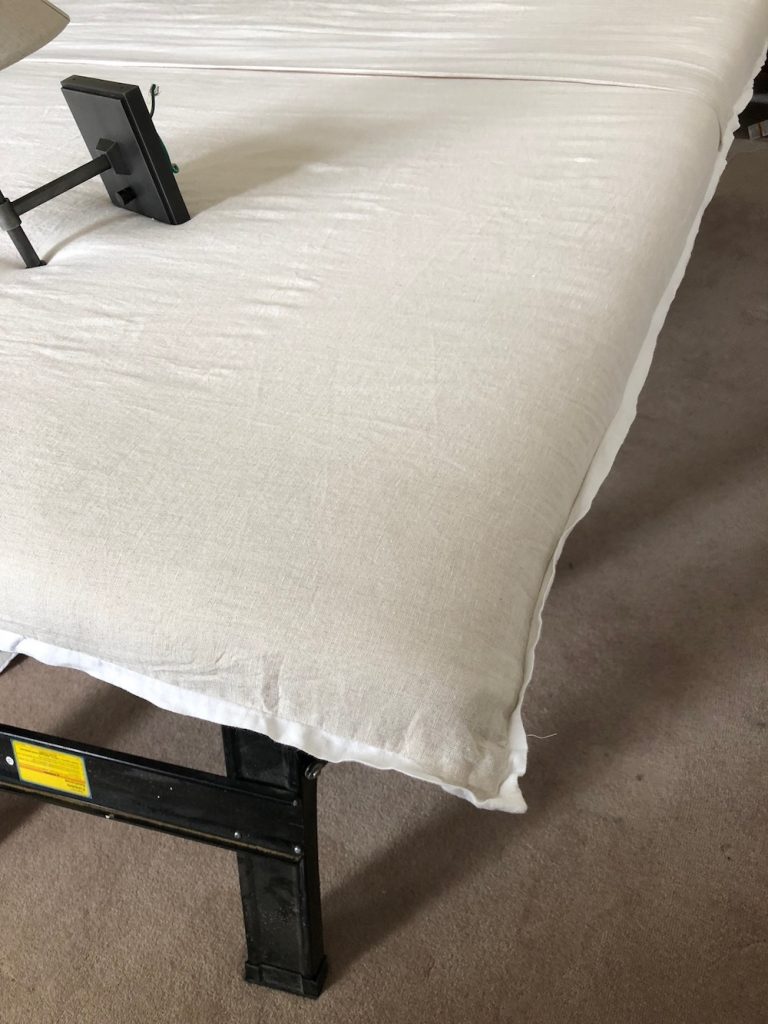
Use this time to shift the duvet around and line up the flanged edge. If necessary, add pleats. You can add one pleat down the center or split it up. We split the pleats in two, dividing the headboard into thirds.
Next, slowly start to staple gun the duvet to back of the headboard. Start from the corners in. This will give you those finished flanged edges all the way around the headboard.
Once you have staple gunned the duvet in place, cut off excess fabric.
We steamed the headboard to get out as many of the wrinkles as we could, but Belgian Flax Linen just looks wrinkled. I didn’t want to secure the pleats in the middle, because I wanted to avoid the tufting effect, so the staples are carefully placed and the bed holds it as well.
So far so good!
We secured our headboard to the wall with a French Cleat. This insures the headboard won’t move or fall over.
This system is great because it’s super easy, holds a ton of weight, is HIDDEN, and doesn’t budge. You can use this for pictures or signs you buy with out proper hooks, headboards, vintage fireplace mantels and more!
Scotch Guard the Bejezus out of this thing. I used 2 cans and could honestly handle a 3rd. So far, 7-8 months in, we are LOVING it and it’s holding up great.
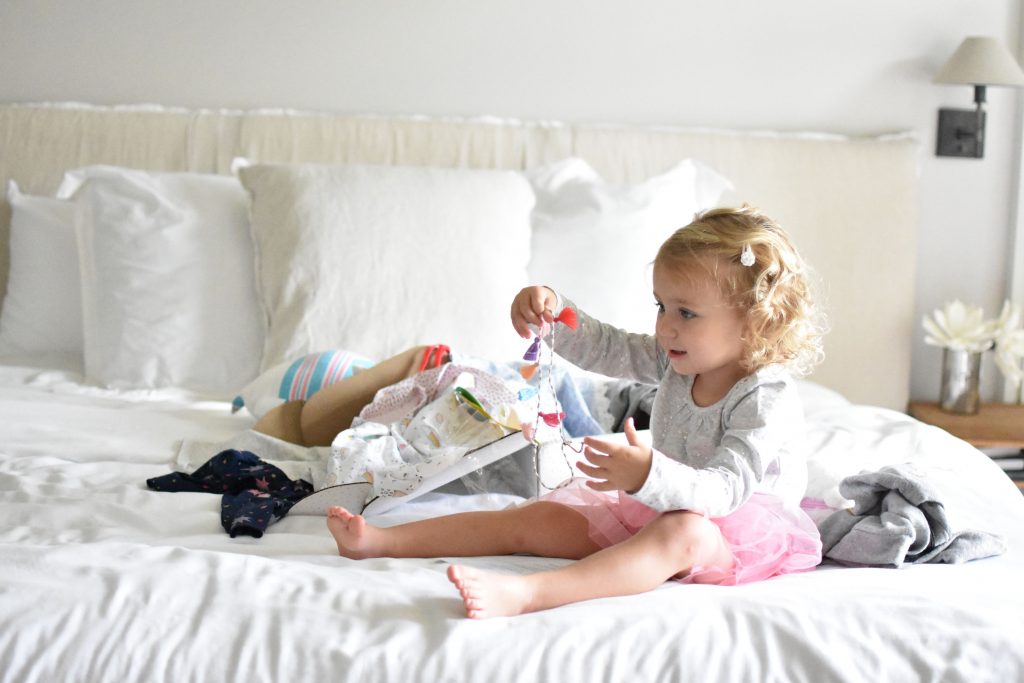
**The paint color in our Master Bedroom is Moth Grey by BEHR**
__________
Similar Posts |
- Industrial Curtain Rod DIY
- Brass Chandelier Make Over
- DIY Fireplace Bench Cover
- Chalkboard Wall
- French Door + Transom Installation with Home Depot
__________
Social Links:
Facebook | Instagram @CandaceCottet | Pinterest
(join the 730,000 other monthly views!)
Don’t forget to Pin and Share!