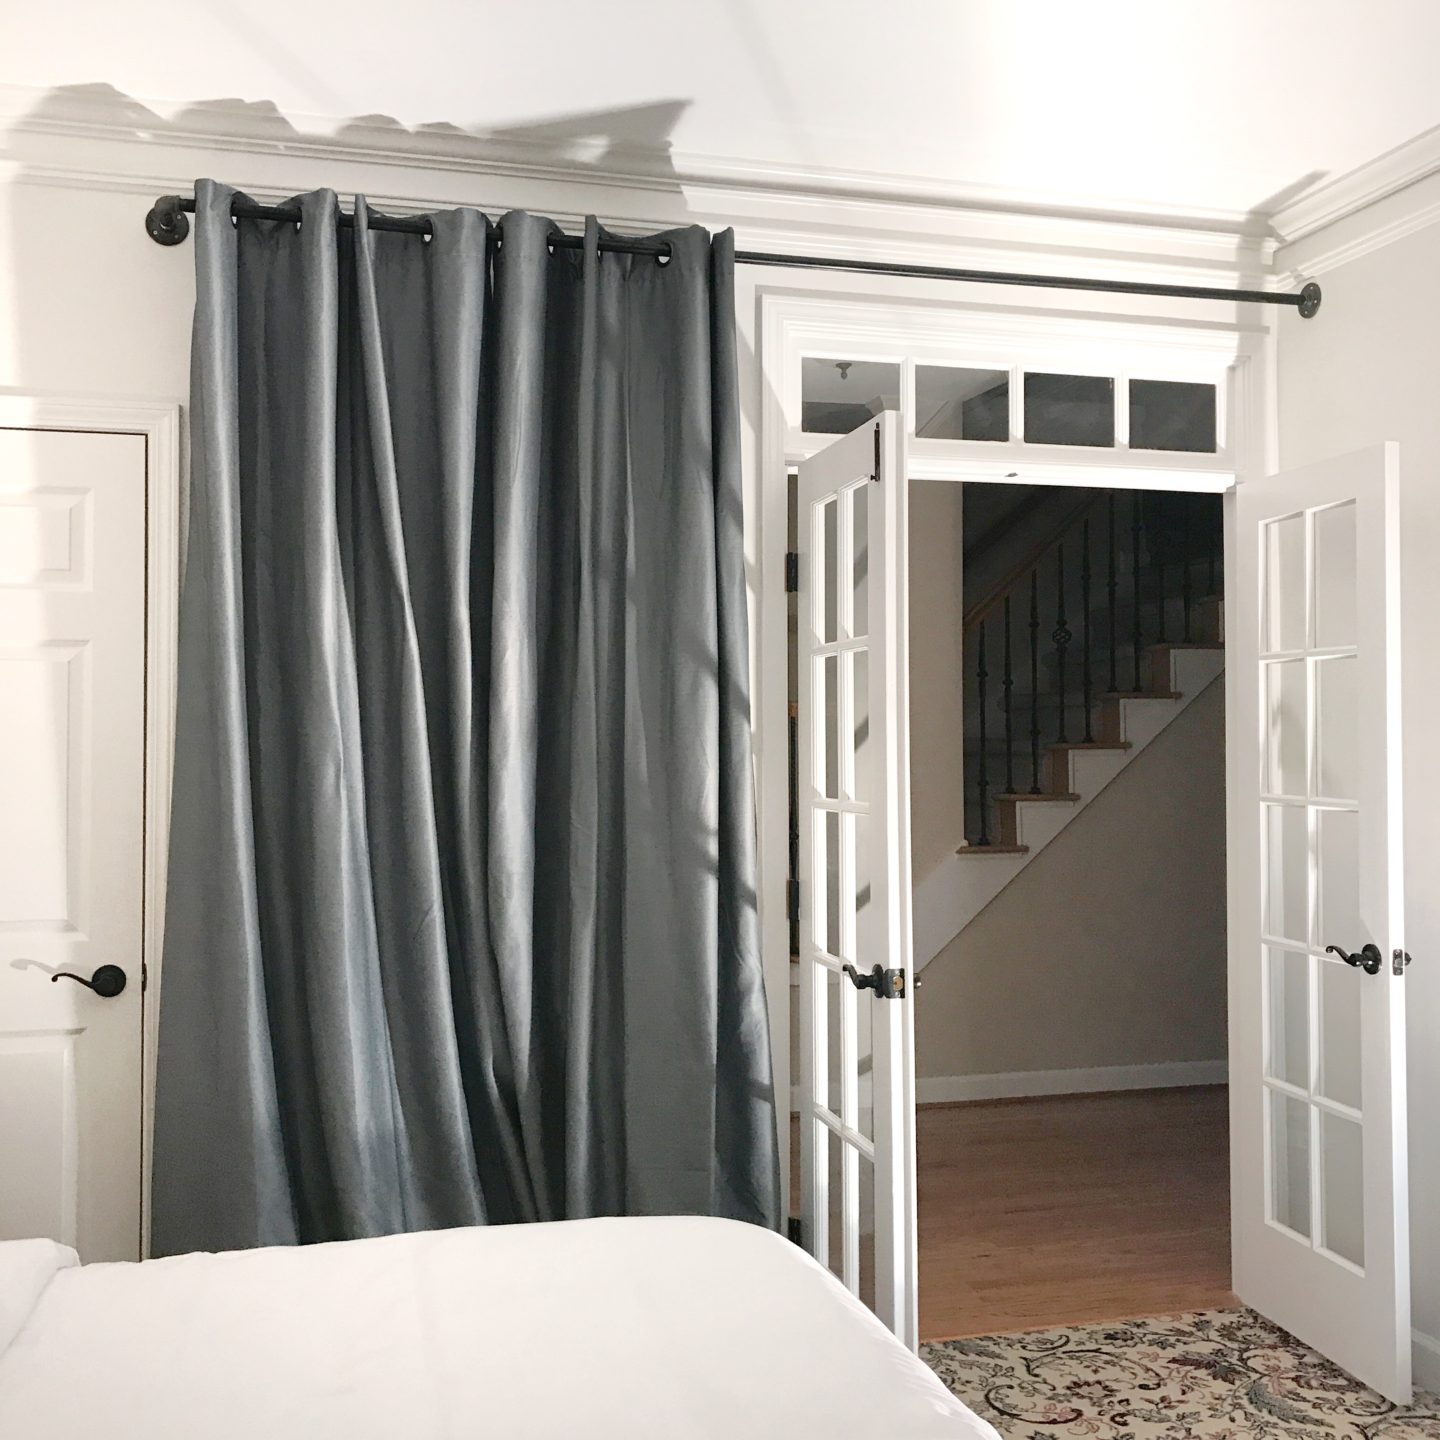
I love a good DIY. And even more when it’s the cheaper option.
When we bought the house, the downstairs room was actually an open entryway office. And while those windows are incredible for an office, it became quickly apparent that we would need a downstairs guest room for our parents. We decided to have Home Depot place some french doors on the room and convert it into an airy guest room. Because this is at the entrance of the house light, and these windows are a huge source of light downstairs, keeping the room light and bright was a must. French doors made the most sense. They match pocket doors that lead into the dining room, and it makes it where if we ever were to sell, the next owners can decide if they want it to be an office again. It was a win-win all around.
There are perks to living in a home well thought out by a developer like John Wieland (Like the basement being stemmed for a bathroom), but there are also annoyances like not being able to match anything. I called the John Wieland company to try and get specifics for the french doors to match the pocket doors, but they had zero info for me. They didn’t care to be honest. So, I got over my perfectionism (with help from a few friends) and headed to Home Depot. The customer service at our Home Depot was great. They gracefully dealt with my anxiety and installed the doors and transom for us without faltering.
But now that guest room needed a little privacy!
I am easily drawn towards making everything white and fluffy, so I like to ground that out with industrial heavy pieces. That’s where the DIY industrial curtain rod came in. I was inspired by an old library ladder and wanted a 3/4″ industrial piping rod to go from wall to wall. But because ceiling to floor black-out curtains can be heavy, we decided there needed to be supports over the door frame as well. We started in steps, but will eventually change out the elbow for a T and have the piping continue to the wall to complete the line.
These are the measurements and pieces we used, but if you are working on a particular project, feel free to comment or message me so I can help you with exacts.
Home Depot will be able to cut and thread the pipe for you for FREE if you buy it there!
What You’ll Need for a DIY Industrial Curtain Rod
Pictured are the parts needed. Here is the FULL shopping list.
- Floor Flanges
- 4″ Nipple (Give the perfect spacing for the curtain to swing.)
- Elbow
- Pipe (Ours was 105″ long)
- Simple Green
- Steel Wool
- Dry Wall Anchors
- Construction Screws
- Drill
- Stud Finder
- Level (preferably a magnetic one!)
- Curtain
I used a 3/4″ pipe with match 3/4″ flanges, nipples and elbows for this project because the grommets for the curtain were heftier. But I have use 1/2″ piping and pieces for our upstairs, which has a daintier curtain. Make sure to measure the sleeve or grommets before purchasing!
Because of the shape of this projects we only needed 1 nipple and 1 elbow.
Our Dimensions & Vision
From the wall to the edge of the elbow needed to be 105″ to line up exactly center with the door frame. When you go to Home Depot, BRING A TAPE MEASURER. Put the elbow on one end and then grab a floor flange and measure to the back side of it.
When you get it all home, clean the grease of with Simple Green and steel wool. This will take the white writing and grease off the pole. I washed and wiped it several times (it’s a very messy process/wear ugly clothing), then let it dry, rinsed with water, wiped, and dried again.
Now for the fun! Assemble the rod completely without the curtain on it. Hold it up to measure it and then mark the drill holes. This is why a magnetic level helps! You’ll want to make sure your elbow piece is at a right angle as well.
Check for studs! If you have a stud there, you can use construction screws, if not you will definitely need those drywall anchors. Start by just drilling ONE SIDE! The is no wiggle room with metal piping so going slow is worth it!
If you are dealing with drywall anchors on each side, once one side has the anchors in the wall, hold the rod up again (fully assembled w/o curtain), lightly put in two drywall screws and re-check the other sides markings. Take it down and add that side’s drywall anchors. We had dry wall on one side and a stud on the other.
Add the curtain to the rod and fully assemble the rod again. Check that it’s all lined up once more and finish screwing. Ta-da! Done!
Now we just need to add some wooden floating shelves and a vintage pho-mantel! My mind always creates objects that don’t exist, so I’ll fill you in on how we achieve my imaginary design as we go.
Shop the Decor in the Guest Room!
(And see the inspiration HERE!)
The Upstairs Bedroom Version!
Save

