If you have ever been on Pinterest or followed Joanna Gaines, you’ve seen gorgeous raw wooden tables with sturdy steel black powder-coated legs. Some of you probably decided to google those tables, like me, to see “How much would this cost?” and then you’ve almost died of sticker shock.
Those tables are THOUSANDS of dollars. And if we have just met, let me introduce myself – Hi, I’m Candace and usually when something is too expensive, I think… “I’ll just make it.” Pregnant that meant, “My husband will just make it.” Poor guy. He is a champion.
I pulled a ton of inspiration photos and piqued his interest. We started watching DIY videos on youtube and visited a local woodshop.
Peach State Lumber Products is an amazing place. It’s a huge warehouse full of wood and you can grab any type of wood you can dream of. We wandered around a choose Knotty Alder Wood. It was 2” thick, gorgeous grains, and not a billion dollars. We had a few 10-foot boards cut into 5 ft boards and loaded them up.
And then they sat.
How to Make a Wood Live Edge Table Top
Prepping the boards to make your wood table top
We laid the boards out in the breakfast nook space to decide what order they would go in and which sides were up. We labeled them with a pencil. (Sanding, later on, will take the pencil marks off. Write lightly so you don’t leave grooves.) We labeled our board 1 through 4 for future reference.
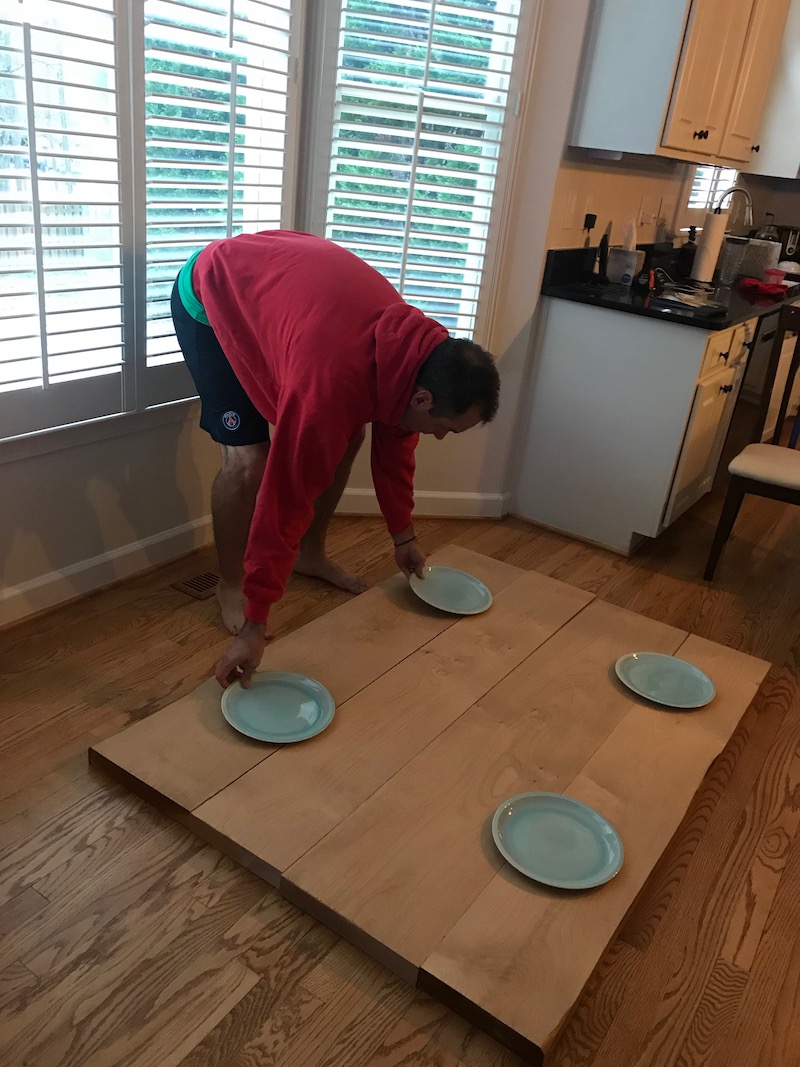
Putting plates out helped me figure out how big of a table I wanted. I wanted to make sure there was space for 6 and food in the middle.
Then Jeff made a jig to get the interior edges square. That way they would butt up to each other seamlessly.
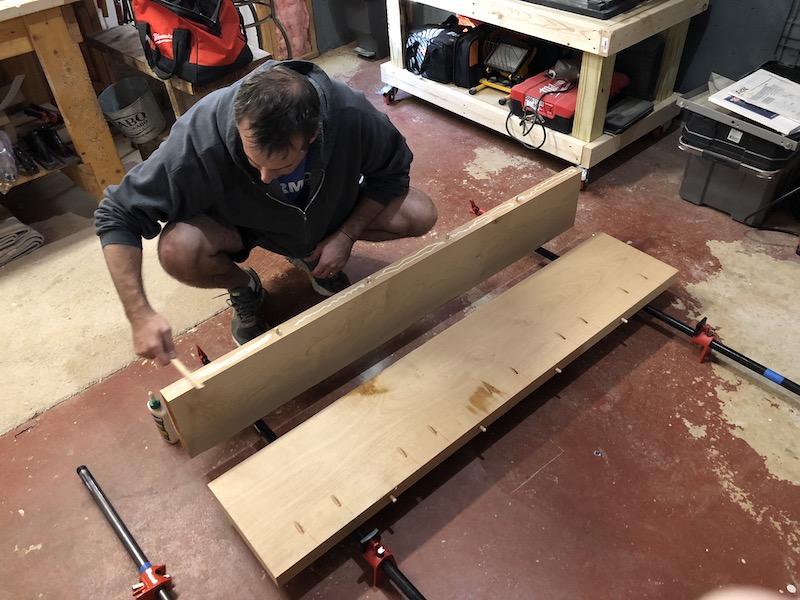
Step 1: Starting with just 2 of the boards we starting joining them together to make the tabletop.
Once the boards were prepped, we had to join them together. Jeff used 3 types of joiners. (He said this was overkill, but the wood was heavy and we would rather overdo it than not. This was a one-shot deal.)
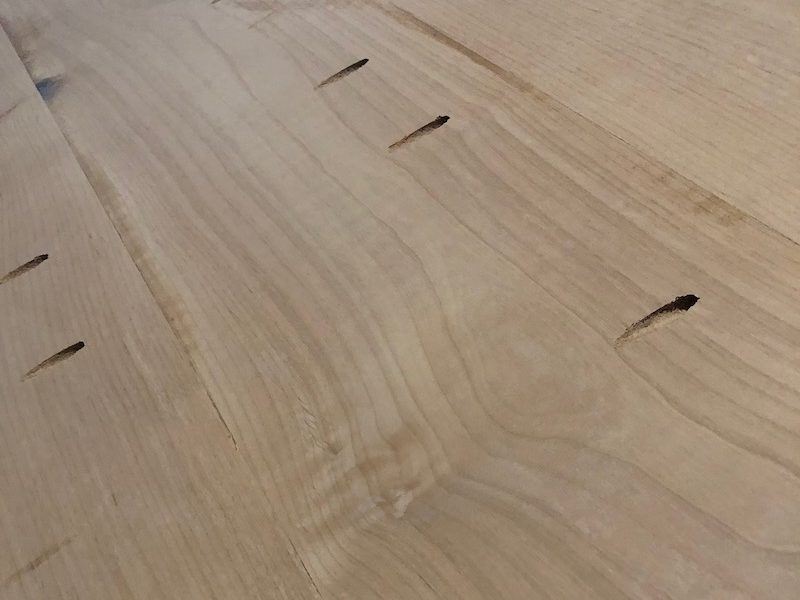
- Dowel Jig – Think Ikea. On the 2” interior edges of the boards, we drew a line splitting the board horizontally in half. Inch on top of the line, an inch below. Then we split the measurement of the length of the board into 3’s. So a 60-inch board would be at 15 inches, 30 inches, and 45 inches. This was more so for alignment and structure rather than the actual joining of the boards. At the 15”, 30”, and 45” marks we drilled a hole using a dowel jig and popped a dowel in. So between each board is 3 dowels. The dowel jig is helpful because it has a stop on it and only goes in so far. We didn’t hammer them together just yet!
- Pocket Holes – We flipped the boards over to work on the underside. Now that each board was split up by the dowels, you basically have four 15” sections. In each 15” section we added 2 pocket holes using this jig. These on our table were at 5-10-20-25-35-40-50-55. We did this on boards 1, 2, and 3 so that they would drill into boards 2, 3, and 4.
- Wood Glue –Titebond – Wood glue is incredibly strong. For a lot of projects, this would be enough to bond, but we always like going the extra mile.
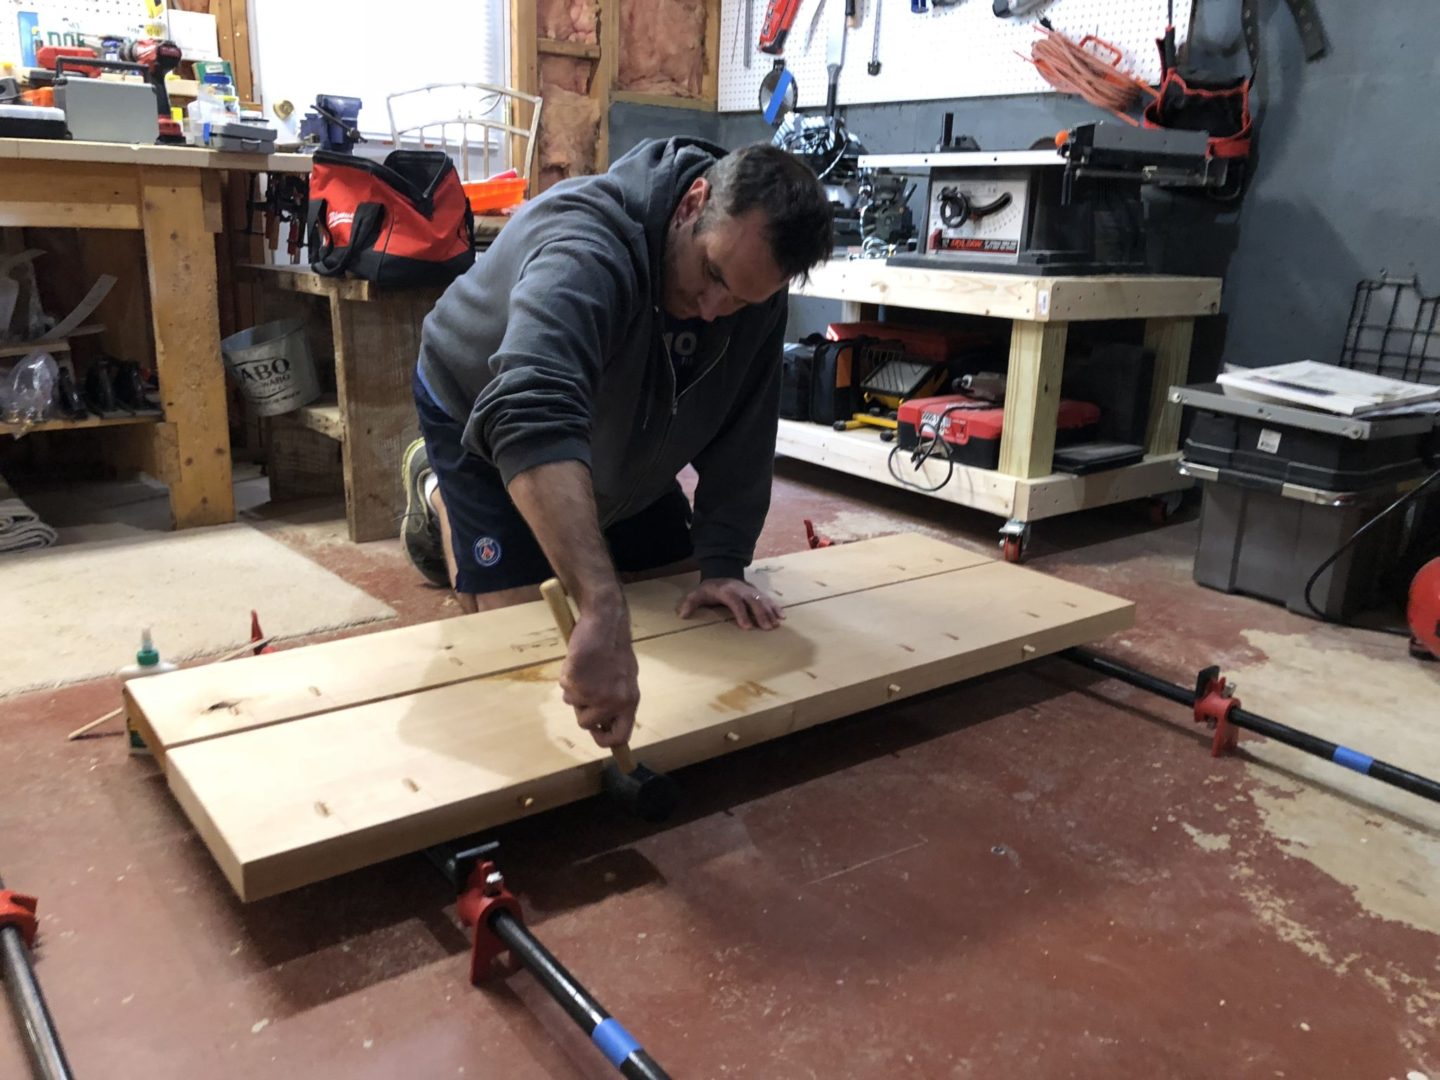
We took the wood glue and did a bead down the edge as well as into dowel holes. Then smeared the glue to make it cover the interior edges of boards 1 and 2. Making sure the dowels were straight, we joined boards 1 and 2 and clamped them together using homemade pipe clamps.
Once those two boards were clamped and any excess glue wiped off, we could do the pocket hole joints on those two boards while they were clamped together. Again wipe off any glue that squeezes out and let dry. At least several hours in between. We waited overnight.
We repeated these steps adding board 3 and then board 4. While you are doing this, You are also straightening out the boards. We don’t have a planer so Clamping with board slivers and paying close attention even the boards out a little during this process.

Step 2: Epoxy-time.
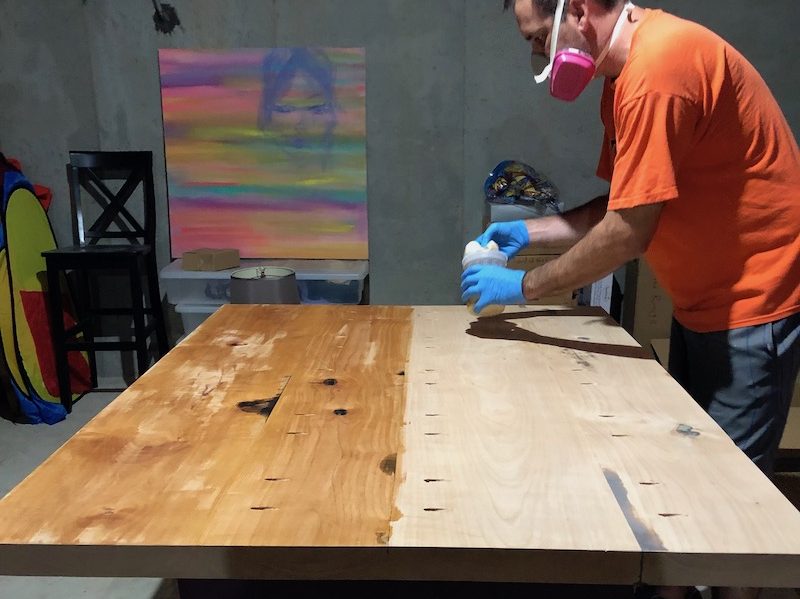
Now is when we used two-part epoxy to fill any holes or knots in the wood. We chose to mix the epoxy with black pigment. You pour in a little blob of it and can see the air bubble out as it fills in the cracks. Just keep pouring it slowly until it won’t hold anymore. This was done on all four sides of the board anywhere then were a knot or indentation. Sealing these up helps to make sure food doesn’t sneak into tiny places, but this also highlights the beauty of the boards. Imperfections in boards become the character you are looking for. It really made the knots pop and make the table start to look more like art than boards.
Step 3: On to sanding!
Oh boy. Make sure you use a good mask during this process. Jeff started out with a cheap mouth cover and ended up at the doctors with a horrible cough. You will not regret getting the better mask. Starting with the orbital sander and 80 grit sandpaper Jeff leveled out the epoxy bumps, BUT he didn’t feel like it was doing a great job. He decided to switch to a belt sander with the 80 grit sandpaper and was much happier with the outcome. It smoothed everything out. He repeated with 120 grit on the belt sander and then went back to the Orbital sander he used 220 grit to finish off the main sanding. He did this on the top and bottom and this took the most time. He used the brush attachment on the shop vac to clean it off in between sanding sessions. Pay attention to the seams and try to get the board as flat and level as you can. He also used the orbital sander to take the sharp corners off the table as well. I didn’t want the edges completely rounded but I also didn’t want it to look right of the lumber yard lot.
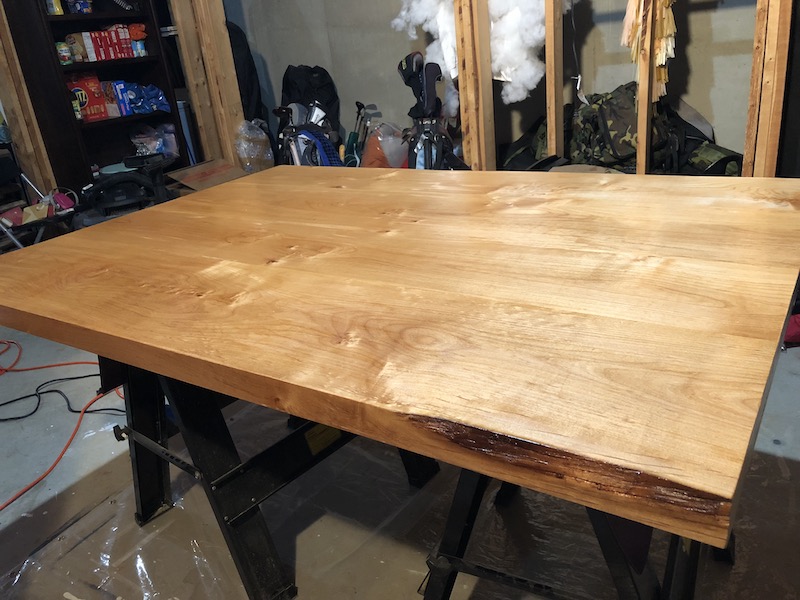
Step 4 : Time to seal this baby up.
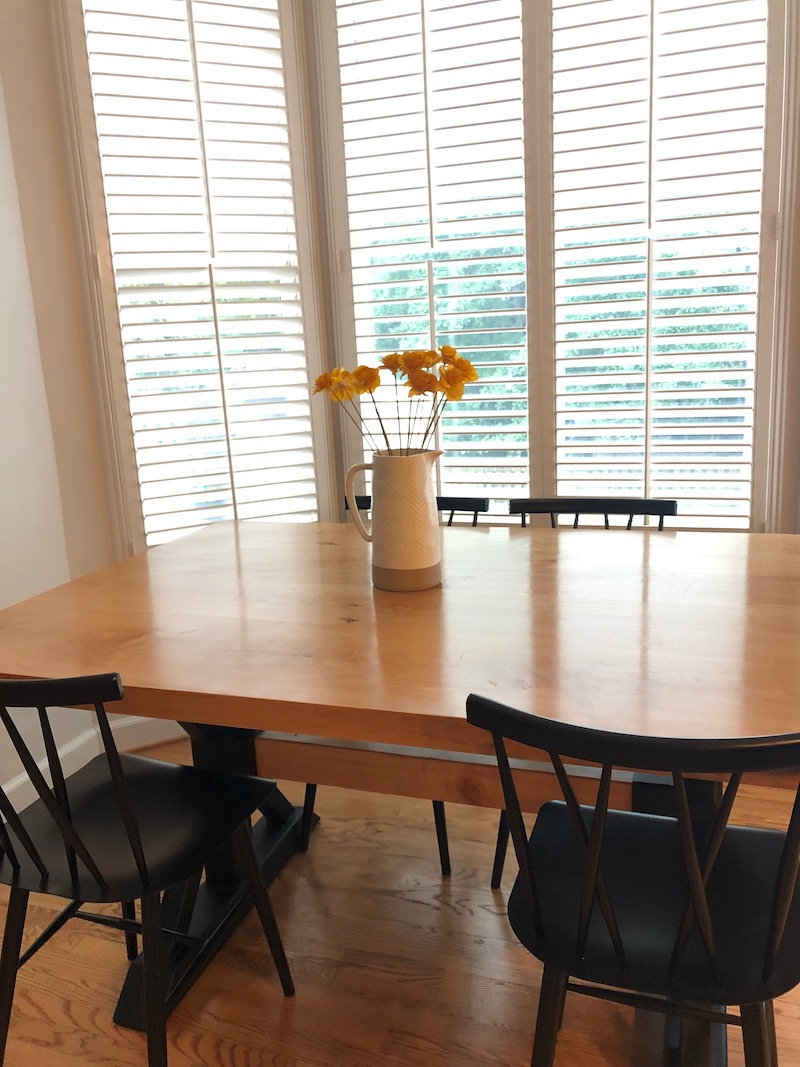
I loved the raw wood, and in an alternate universe, I would’ve left it, but we have little kids and like food and wine. And this was becoming our breakfast table.
We decided to go with the wipe on poly. Jeff used Minwax satin polyurethane and mixed it with mineral spirits in a ⅔ polyurethane with ⅓ mineral spirits.
In between coats, give it at least 24 hours to dry, and then give the coat a light sanding using 400 grit sandpaper.
After sanding out any bubbles, wipe it with a cloth and then a tact cloth to prep for the next coat.
We did between 6 and 8 coats on the table. Jeff lost count. He just got into a grove polyureathening the table every night. I’m convinced he still would be adding coats if I didn’t tell him “Enough!”
Step 5: Once you have the desired coats of Poly on and dry, you are ready for the legs.
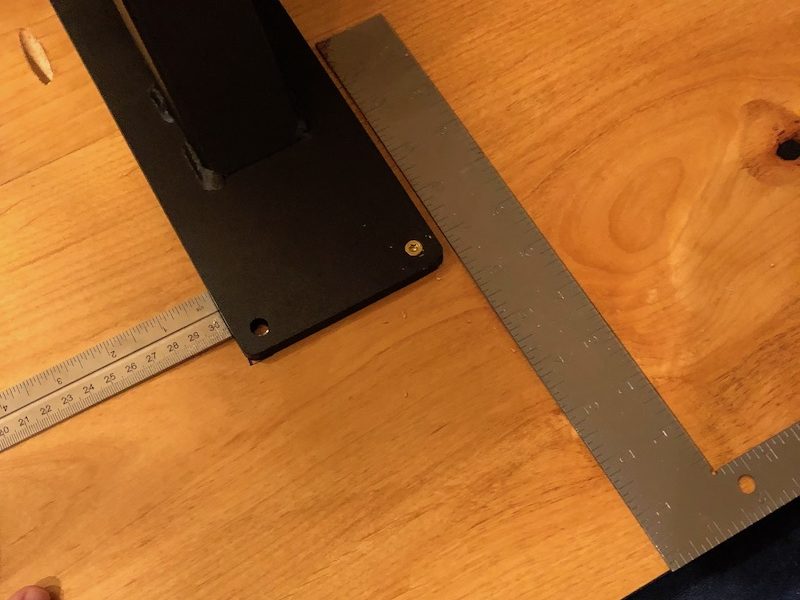
We got ours from Justin on Etsy. These are incredibly well priced and beautiful. We tried to go with someone local to Georgia to skip shipping costs, but they wanted a ton! Justin is your guy.
The tape is how we figured out which size steel table legs to order. But ask Justin, he is great!
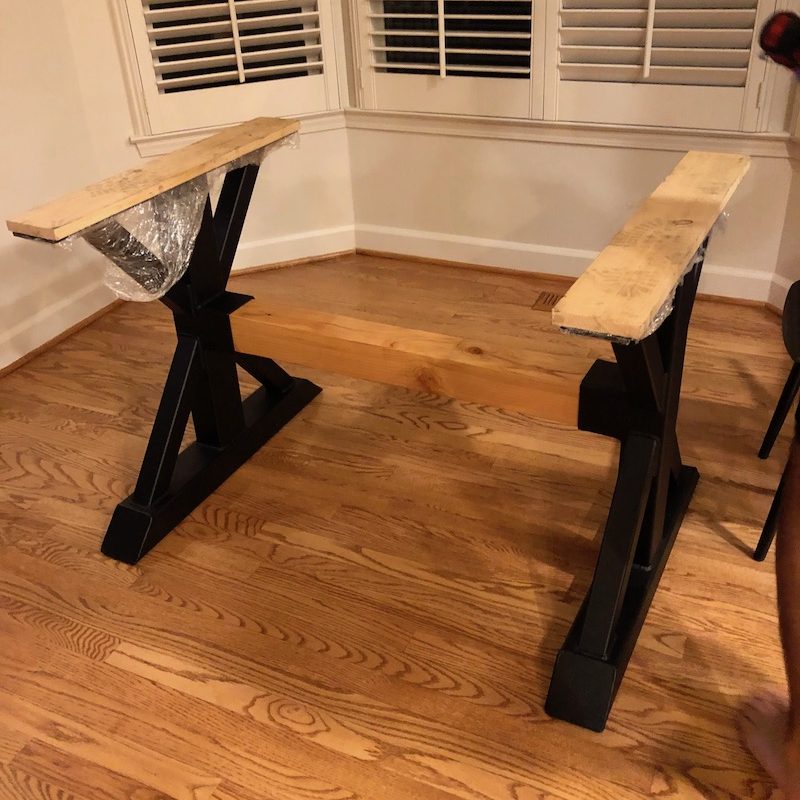
The legs come with these 1x4s on them, but you’ll be un-screwing those sand putting your table there instead.
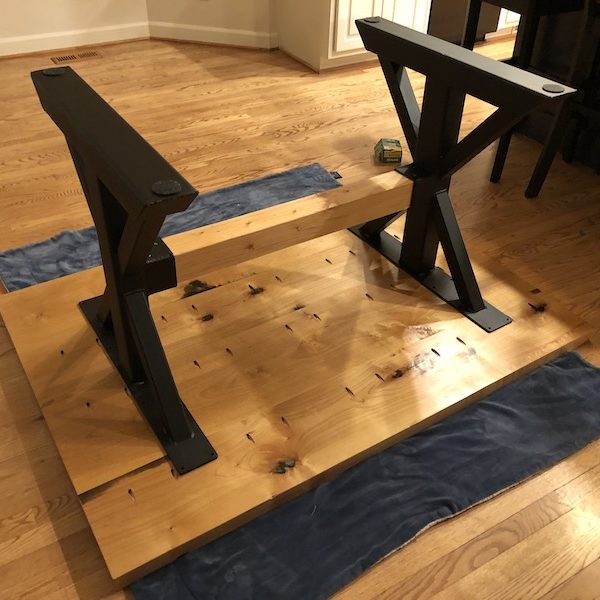
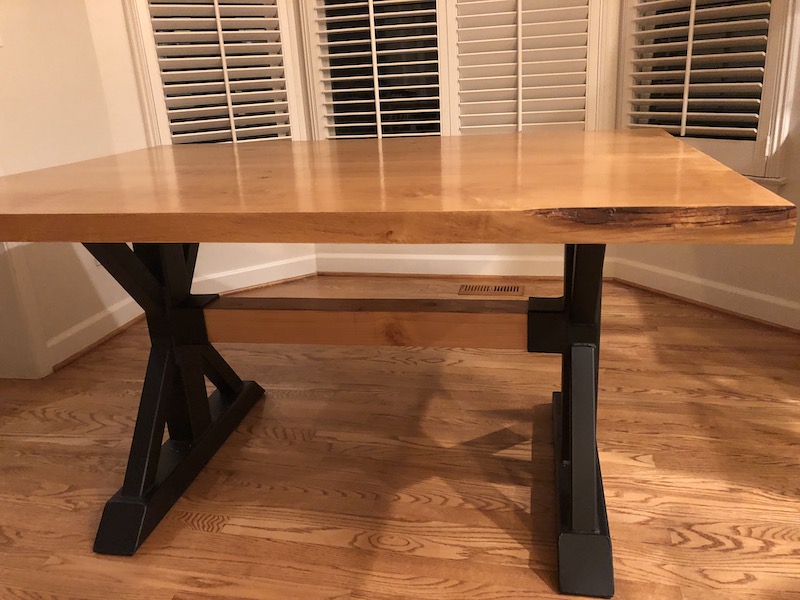
The easiest way to make sure we got this right was to first put the center beam in, and set the table on top. We marked the table underneath and flipped it over. Laying the wood tabletop face down on the floor, and then the legs on it. This allowed us to get everything straight without worrying about the topper falling or moving. It also gave us pressure to drill into.
Once it was drilled in and the beam was level, it was time to flip the entire table right side up. This is a two-person job. This table is incredibly heavy.
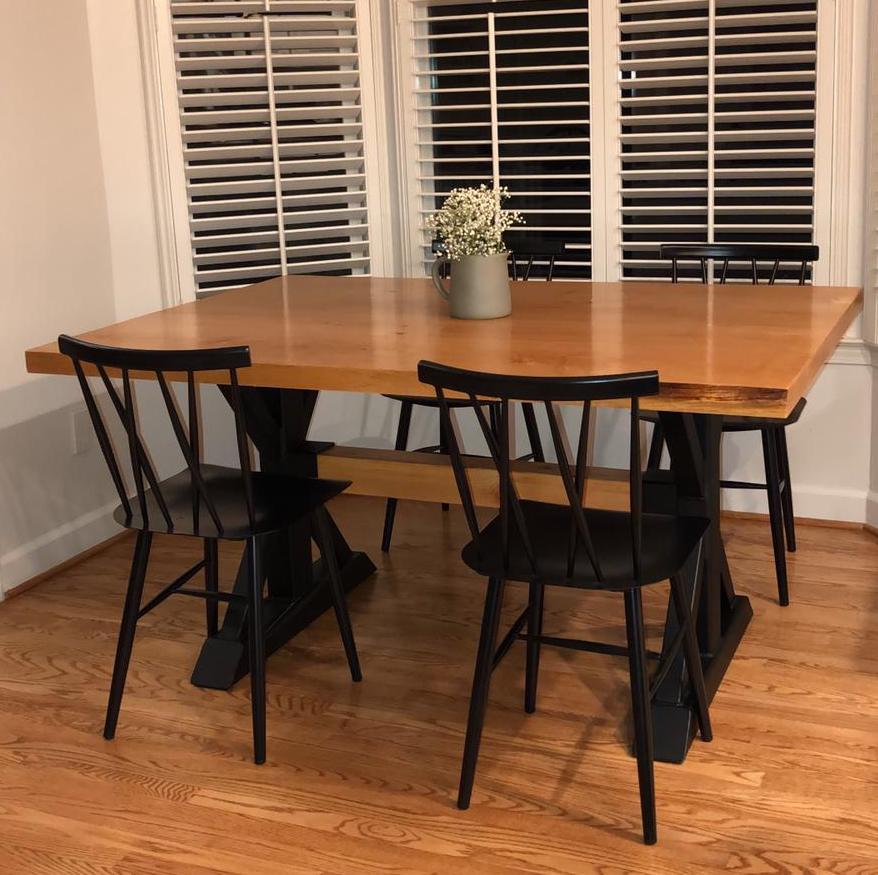
That’s it! The table I dreamed of since we walked through this house was done!!
– Shop the Post –

__________