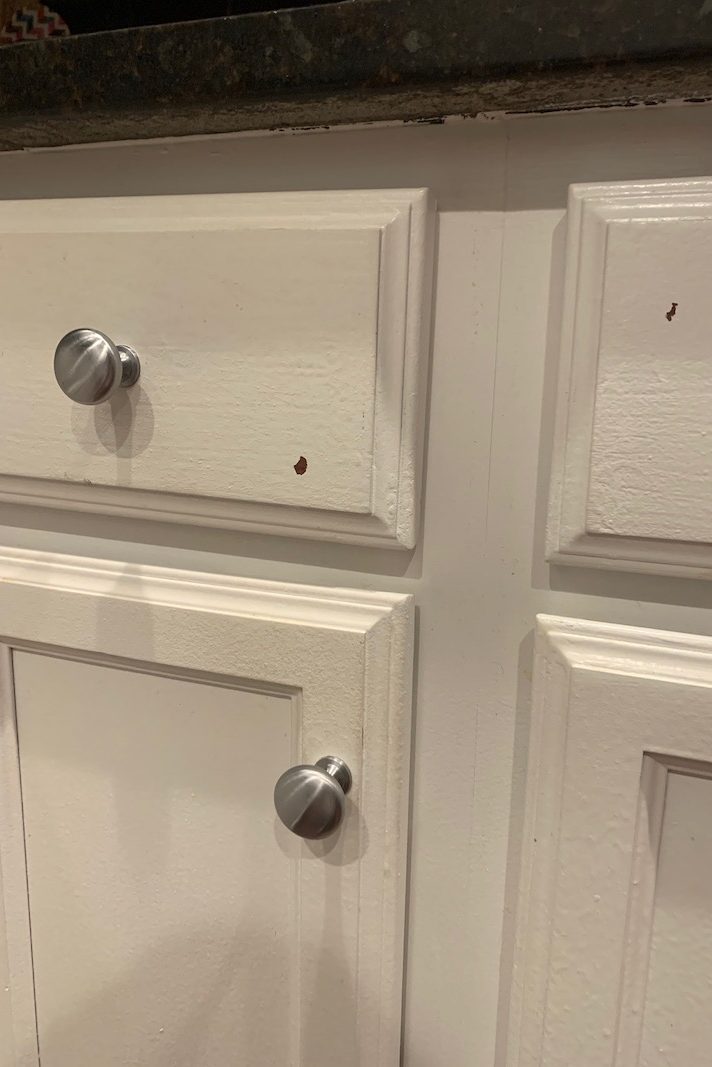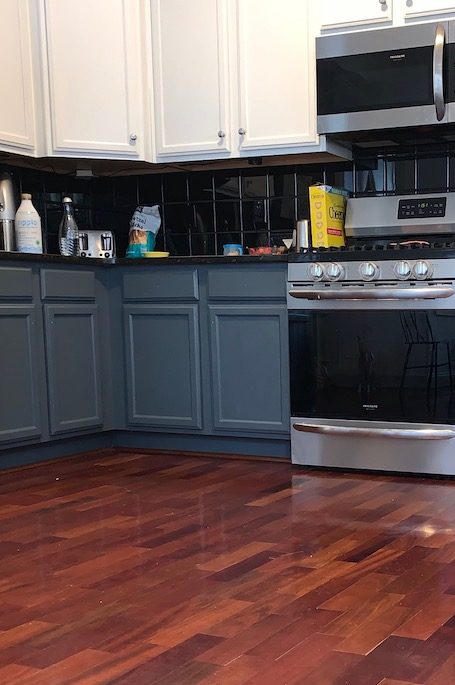
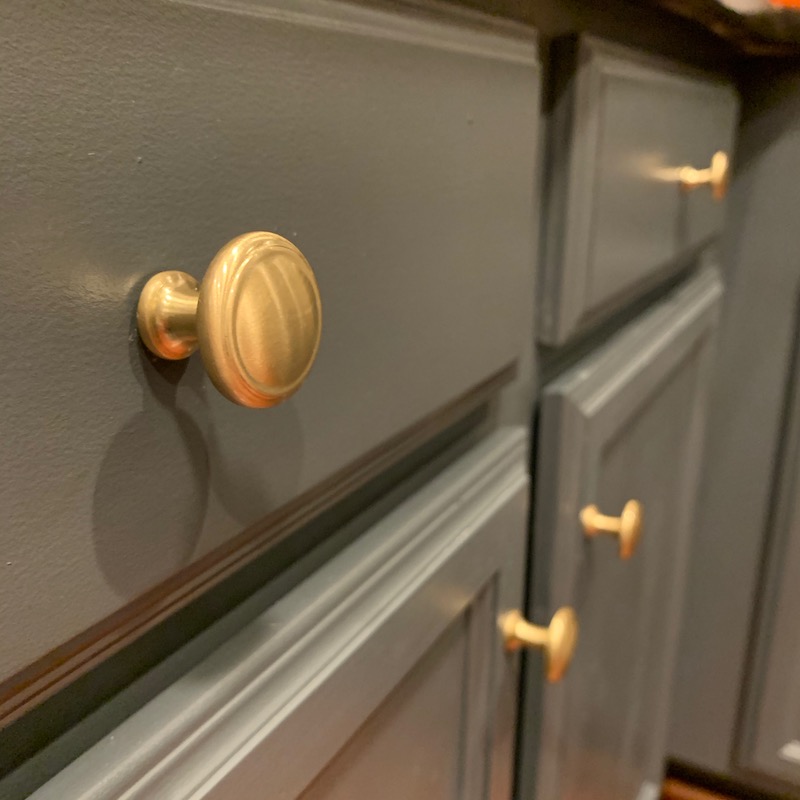
Our lower cabinets in the kitchen were previously painted and starting to peel. I knew I would be painting them from the get go. One day the girls were at school, and I couldn’t hold out any longer. I took the CistriStrip and went for it. Every day I am so glad I did. Painting the cabinets was a huge impact. Paired with painting our backsplash, it looks like a totally different kitchen.
If you need to strip the cabinets first CLICK HERE for a full tutorial!!
When to Paint Your Cabinets?
1. If they have already been painted and need to be redone. 2. If they are a hot mess and this is a way to hold you over for a remodel down the line. 3. You’re bored. Painting cabinets can absolutely look great, but it will require touch-ups throughout the years.
I used this same method on our living room built-in banquet console and they look incredible. Can’t Stop. Won’t Stop.
Why Did I Choose to Use Exterior Paint?
This was a choice that I am thrilled I made!! Traditional cabinet paint is so shiny. I am not a shiny paint person, but I NEED a kitchen to be durable and functional. We all do! Exterior paint can handle a lot and it comes in a few sheens. Making me very, very happy.
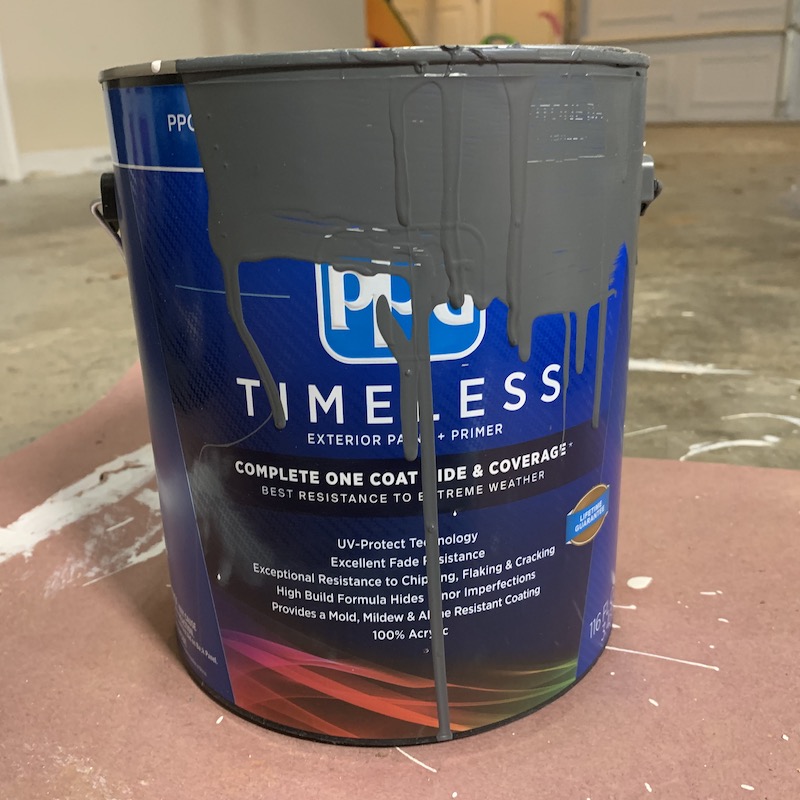
I went with PPG Timeless Exterior Paint in Satin from Home Depot. This paint is durable and self-leveling. Meaning, after 10-15 minutes the pools of paint seem to level themselves out a bit. The finished look is really gorgeous and I’m less worried about it.
The paint color we used is Farrow & Ball Down Pipe colored matched at Home Depot
What Do I Need to Paint My Cabinets?
Wooster Pro FOAM Paint Roller | Foam Cheapy Brushes | Paintable Caulk | Zinsser 1-2-3 Primer | Exterior Paint | Frog Tape | Tack Cloths

Wooster Pro FOAM Paint Roller – Do not use brush other than a foam roller and a foam brush. Wooster Pro is the best at Home Depot. I used a 6″ foam Wooster Pro Foam roller on their Pro handle and it was a gem. There is a 4″ available as well for smaller drawers or shaker drawers. This makes or breaks the project.
Foam Cheapy Brushes – You’ll need these to move paint around and get into the corners. I keep so cheap ones on hand. They get droopy when they get too saturated, so you’ll need to toss them a few times.
Caulk – I skipped this step by accident, but caulking the spaces in-between the trim on the cabinet will give you an even more seamless look! Do this after the tact cloth step, but tact cloth 1 one time when it dry to clean it up for primer.
Primer – This primer is at Lowe’s and Home Depot and it’s a game-changer. Our painter always reminds me that when you are done priming, it should look as if you are done. A word from the wise: Primer for walls will save you a TON of paint in the long run and make the walls come out smooth and even. Same for your cabinets.
Notes Before You Begin:
Do not wash stripper and paint down your pipes!
Start with the backs!

Steps To Painting Your Kitchen Cabinets.
If your cabinets currently have layers of paint on them, use this guide to stripping and prepping them first.
Step 1: Remove & Prep
You’re going to want to remove the cabinet doors. I highly suggest numbering all of the AND adding an arrow to say which way is up. Tape out the cabinet boxes and use heavy paper to cover floors. Layout the cabinets on heavy paper Remove hardware.
Step 2: Clean
Once the cabinets are stripped, cleaned with a deglosser, and dry lay them face down and go over each one more time with a tack cloth. This is when you can caulk any gaps or use wood filler on dents if need be. Broken record: sand and tact cloth!
Step 3: Prime
Using a FOAM roller, prime the backs of each with door/drawer with Zinsser 1-2-3 Primer. Flip the cabinets over and touch up/primer the fronts After drying, lay the cabinets back on their faces.
Step 4: Smooth
Review the cabinets with 320 grit sandpaper and your tack cloth.
Step 5: Paint
Start painting with your PPG Timeless Exterior Paint and a clean foam roller. As you go, touch up bubbles and bumps with 320 grit sandpaper; follow with tack cloth every time. Move through the process to cover in two coats.
Step 6: Hang & Touch Up
Once dry, hang the cabinets back up. Because the light will be coming towards the cabinets at a different angle, you may see spots you’ve missed. Use minimal paint during these touch-ups. The less paint on the foam brushes, the less risk of drips.
Painting Your Base Cabinet Frames
Tape off the inside of the boxes and cover the floor in heavy-duty paper.
Use the Liquid Deglosser to degrease and clean the cabinet boxes giving yourself a clean slate. Once everything is cleaned up, use a light 320 grit sandpaper to finely touch up bases; following again with your tack cloth to remove dust and dirt. I did not strip the bases since they are perfectly smooth surfaces.
Prime the face of the bases with Zinsser 1-2-3 primer using a foam brush. Once the cabinet boxes have been coated twice in primer, use a new foam brush to start painting! Remember, any time you touch up bumps or bubbles with fine-grit sandpaper, follow with the tact cloth. Otherwise, you are just adding dust to the mix.