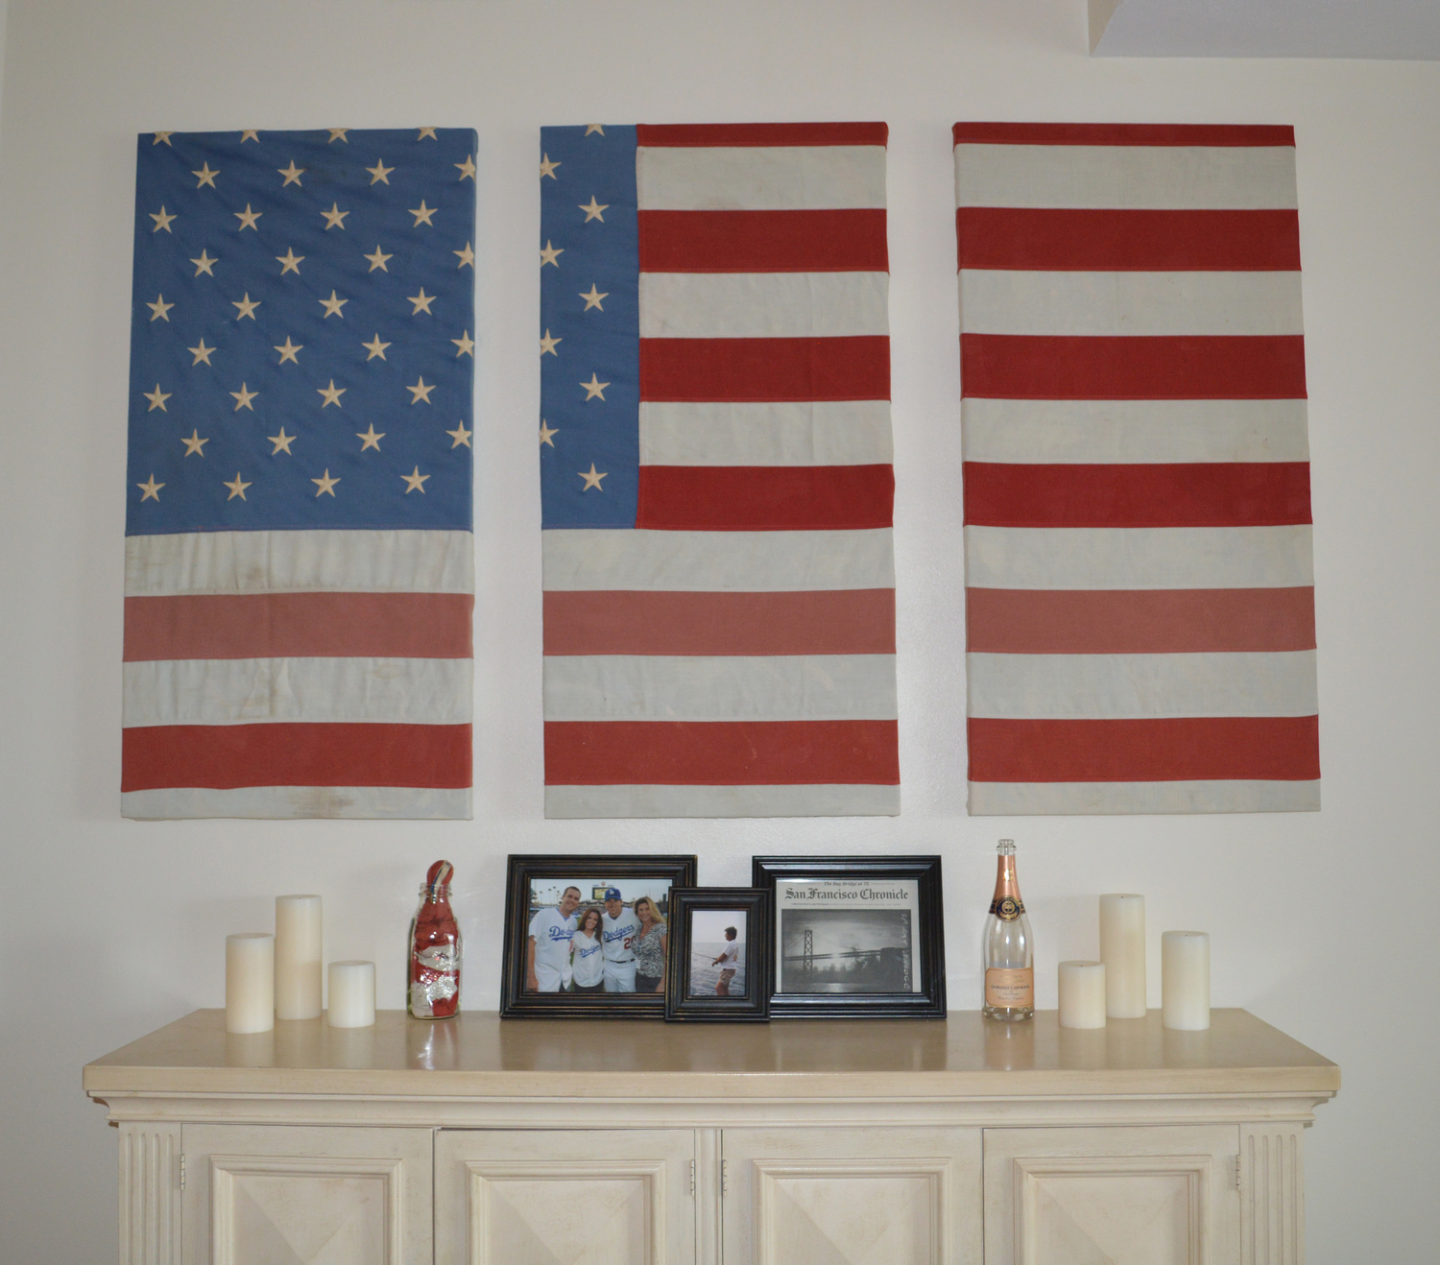
As American Expats, we wanted something to honor the US. We choose to upcycle this large American Flag from eBay and make it the centerpiece of our overseas living room. This American Flag Art DIY is one of my favorite pieces we have made.
Why We Created Our American Flag Art Centerpiece:
Back in 2013, my husband and I were transferred to work overseas. And while we couldn’t pick our home or even any of our furniture, I made sure to make our new place as homey and comfortable as possible. One night we were sitting on the couch, trying to figure out what to do with the empty wall we had over our buffet. Jeff said, “I wish we could put a huge vintage American flag up there in some cool way.”
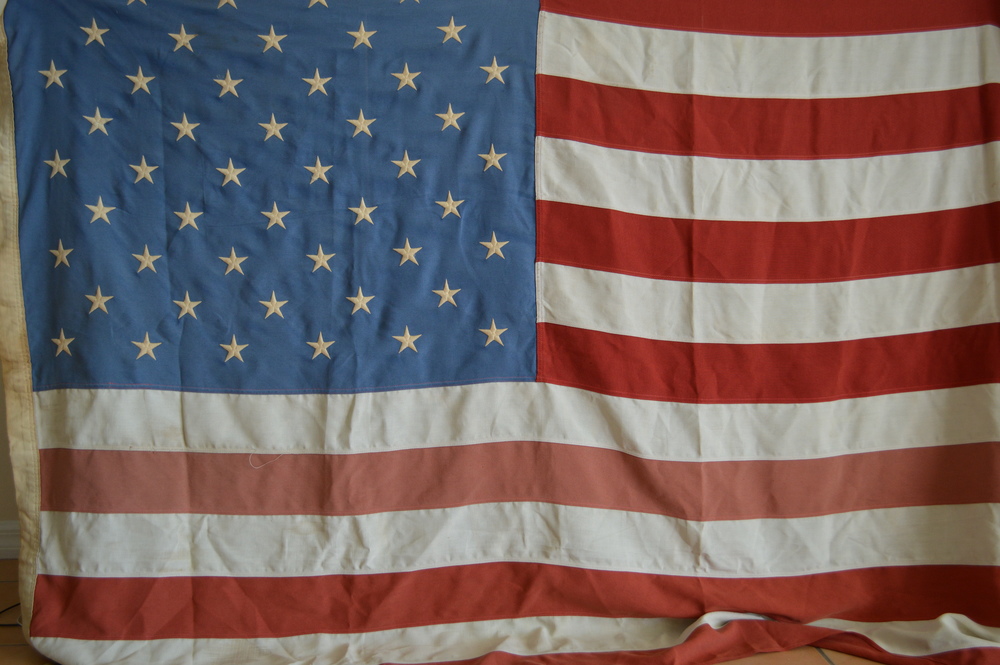
Light Bulb Moment! Of course, we can! I had these 3 canvases from a painting I had done with my old roommate, and I was looking for a way to repurpose them without ruining them. It clicked in my head; let’s get an old flag off eBay, repurpose it, and wrap those 3 canvases in the American flag. We measured out the canvases, searched eBay to find the perfect flag, and ordered a weathered 5×8′ American flag that had lived some life. If you are patient and set alerts, you’ll find some great deals.
When the American flag came, I draped it over the 3 canvases and panicked. We’re going to cut an American flag?! What are we thinking? We called up our friends, Veterans, and pilots for the US government, and asked their thoughts. We all agreed that the project was honoring America – it was ok. And boy, oh boy, do we LOVE this project.
Supplies Needed to Create this American Flag Art
- Staple Gun
- Three 24×48″ Canvases
- American Flag (we used a 5×8)
- Measuring Tape
- Scissors
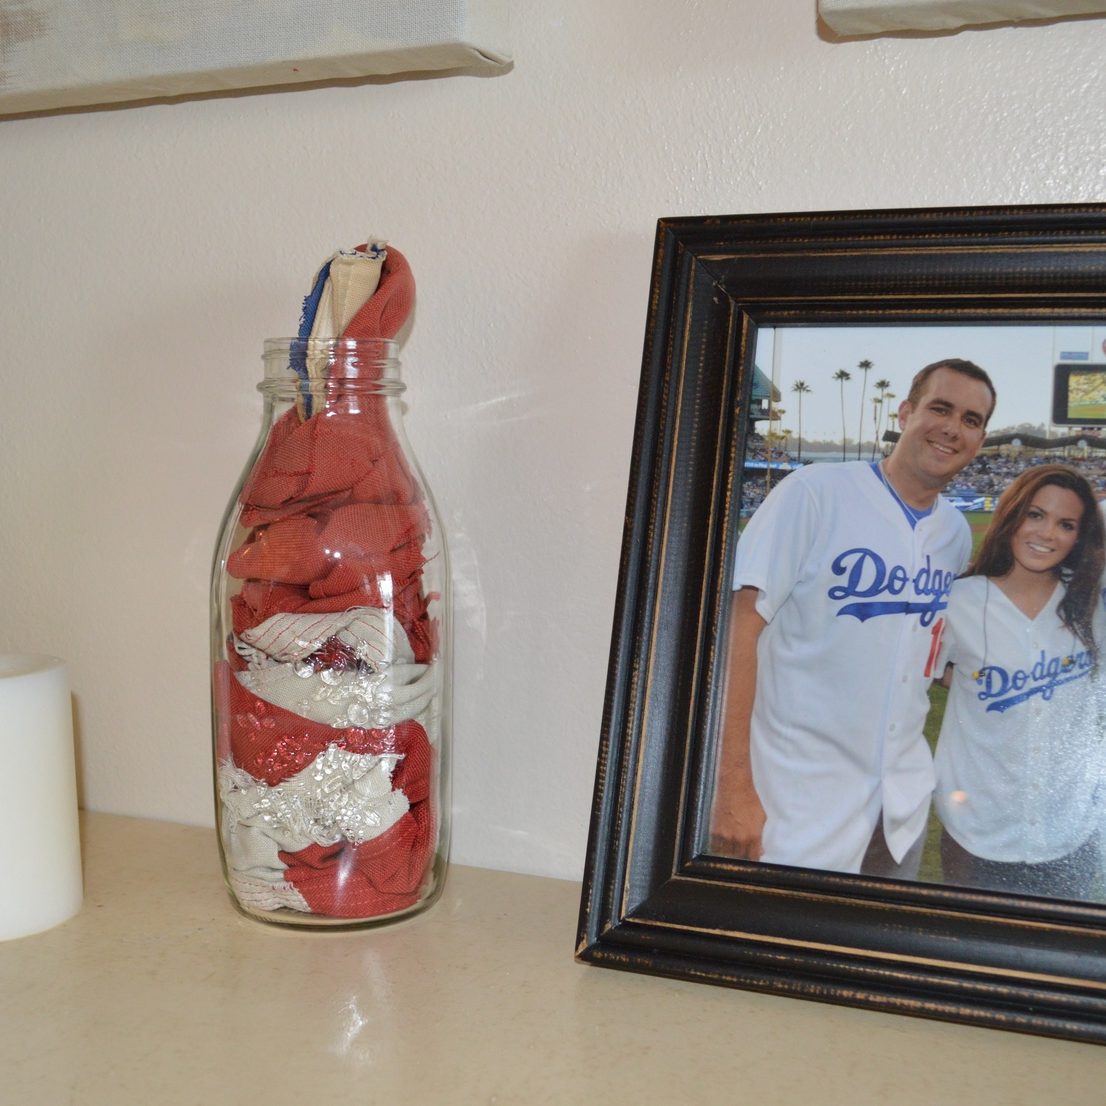
- Jar or Vase (to keep any extra pieces respectfully)
Steps to Creating American Flag Art
Measure Twice – Cut Once
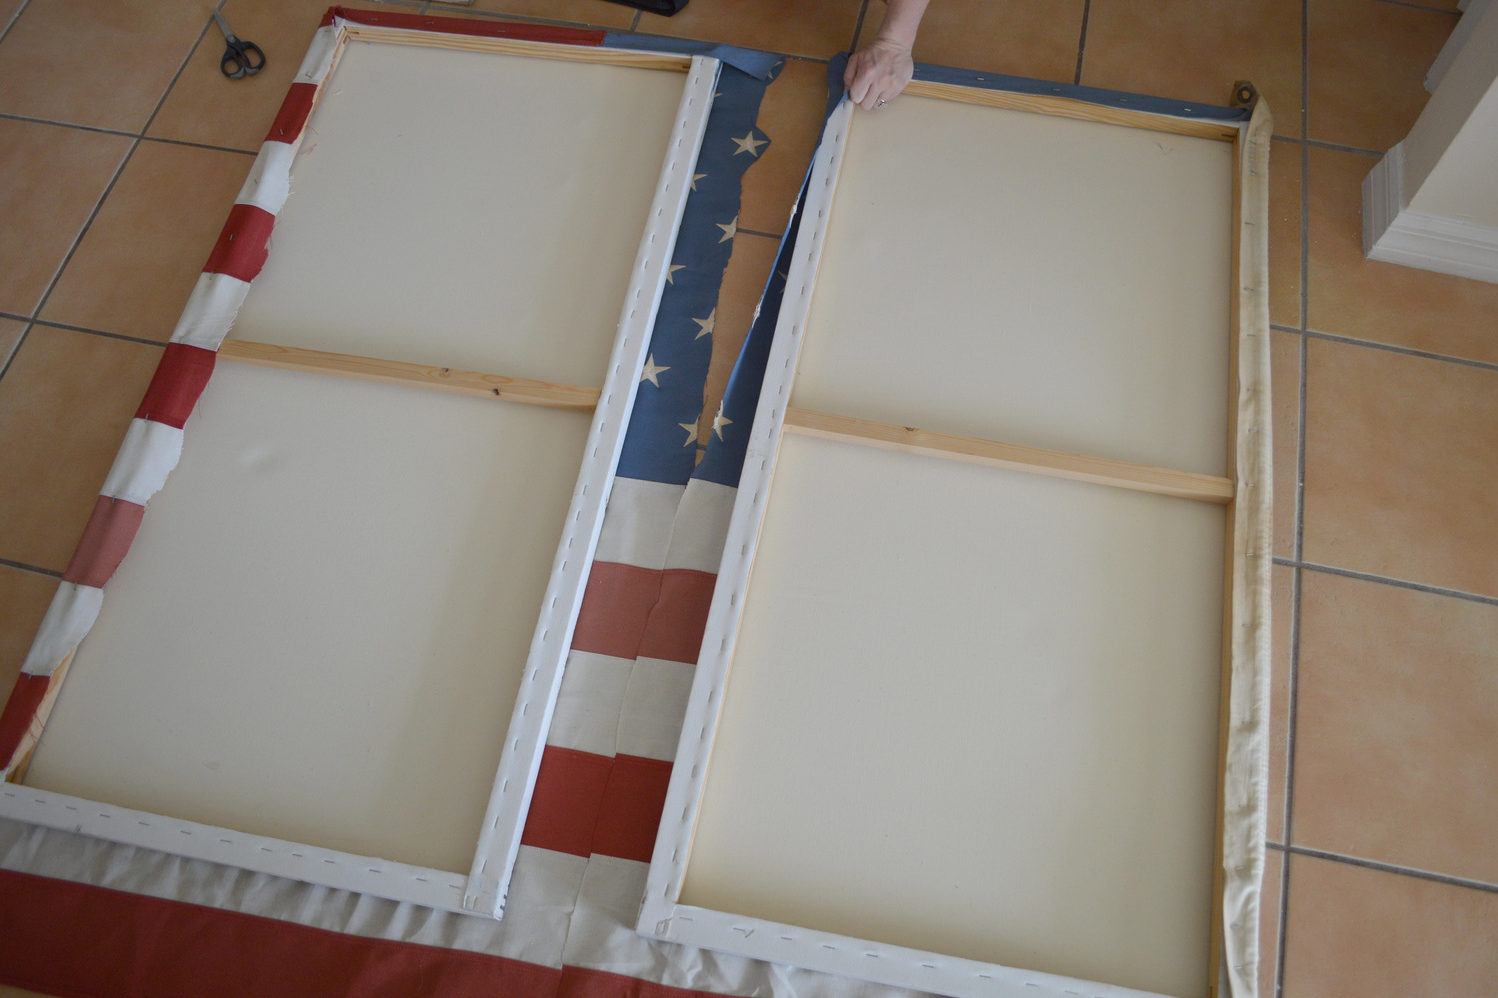
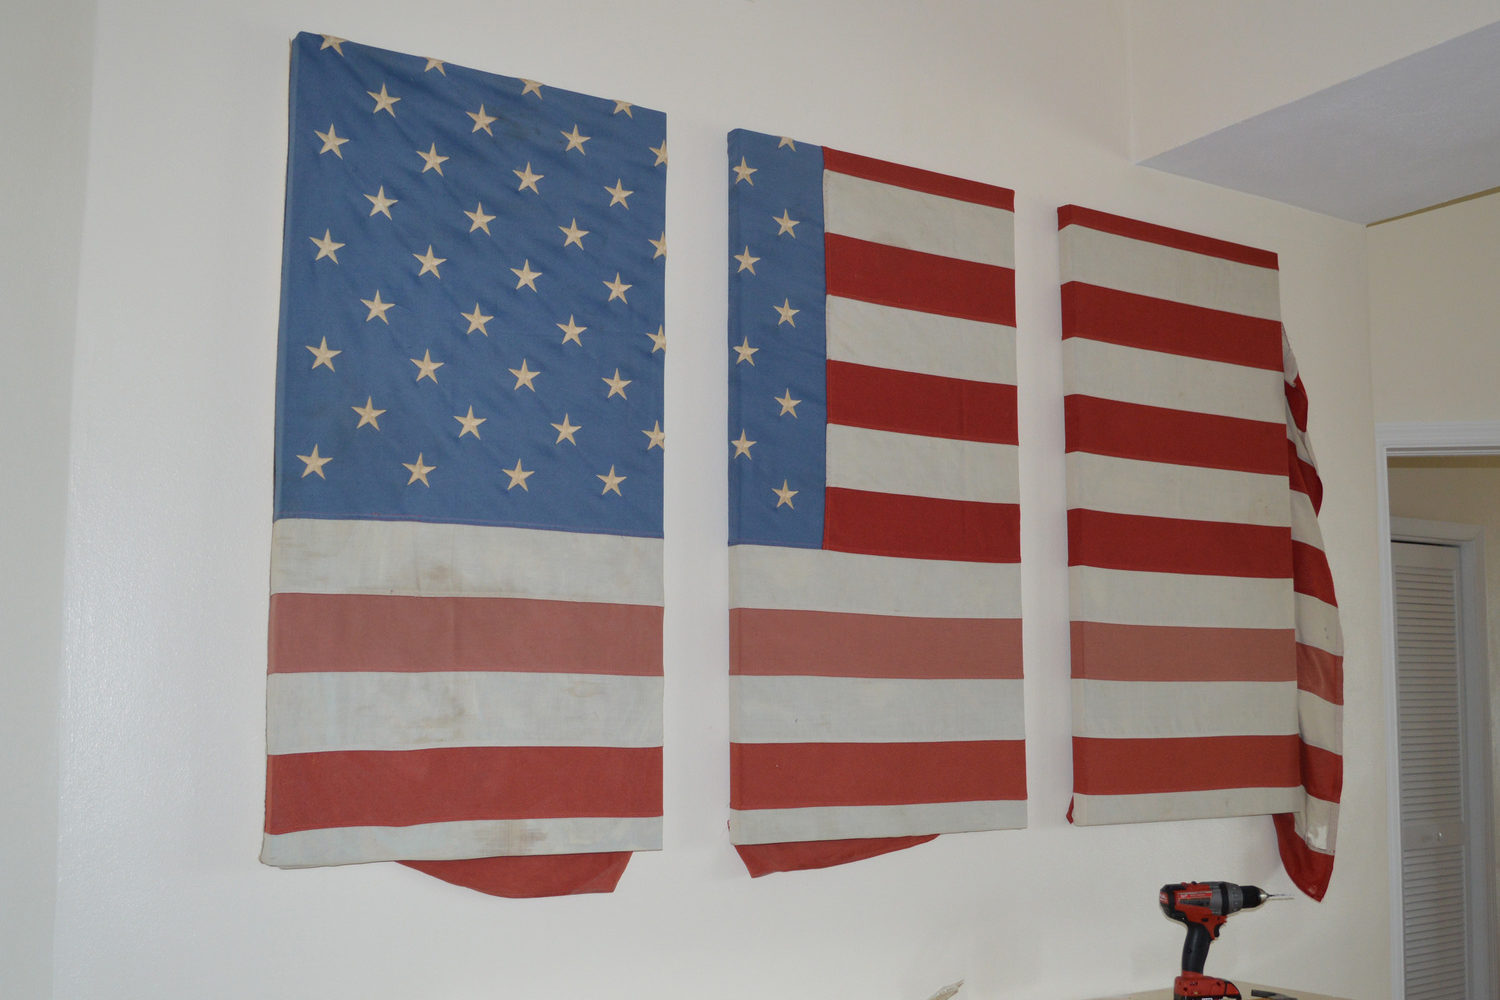
Take your time measuring this out! Since the right side of the flag was too damaged to use we started from the left (stars) which worked out great. We laid the flag face down and the canvases over it. Measuring out how many inches we would need to have between each cut in order to wrap the canvases. This will vary based on the canvas or base you have. Use an outside edge to see how much it will take to wrap the sides of the canvas. Cut the first piece, check that it can wrap the edge. Move to the next.
Level Out & Staple Up
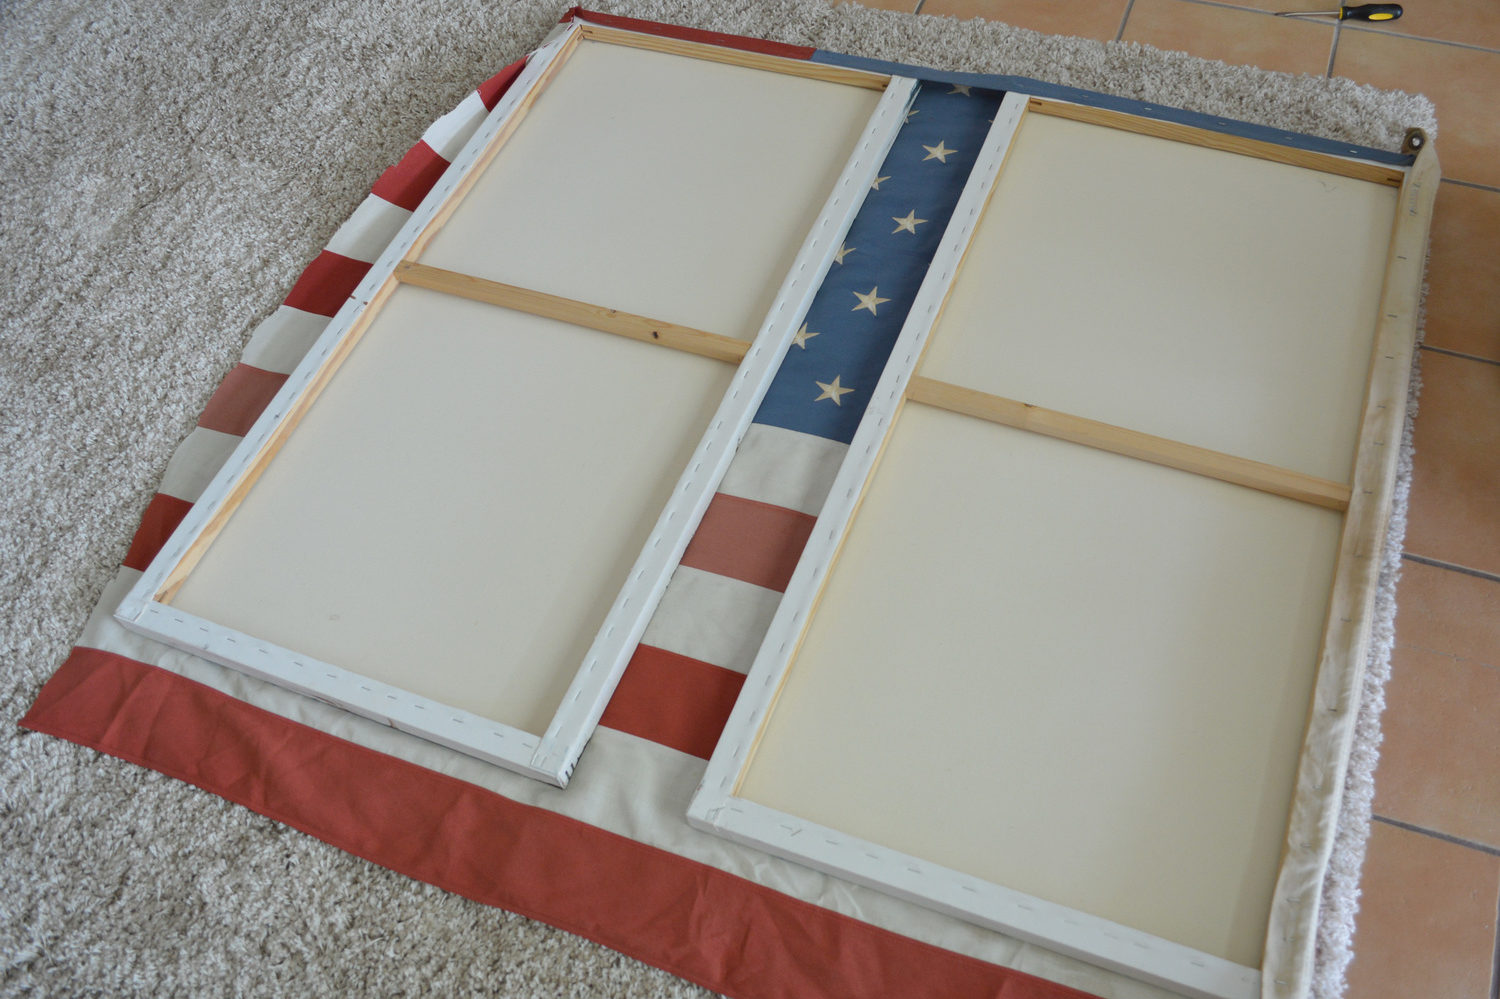
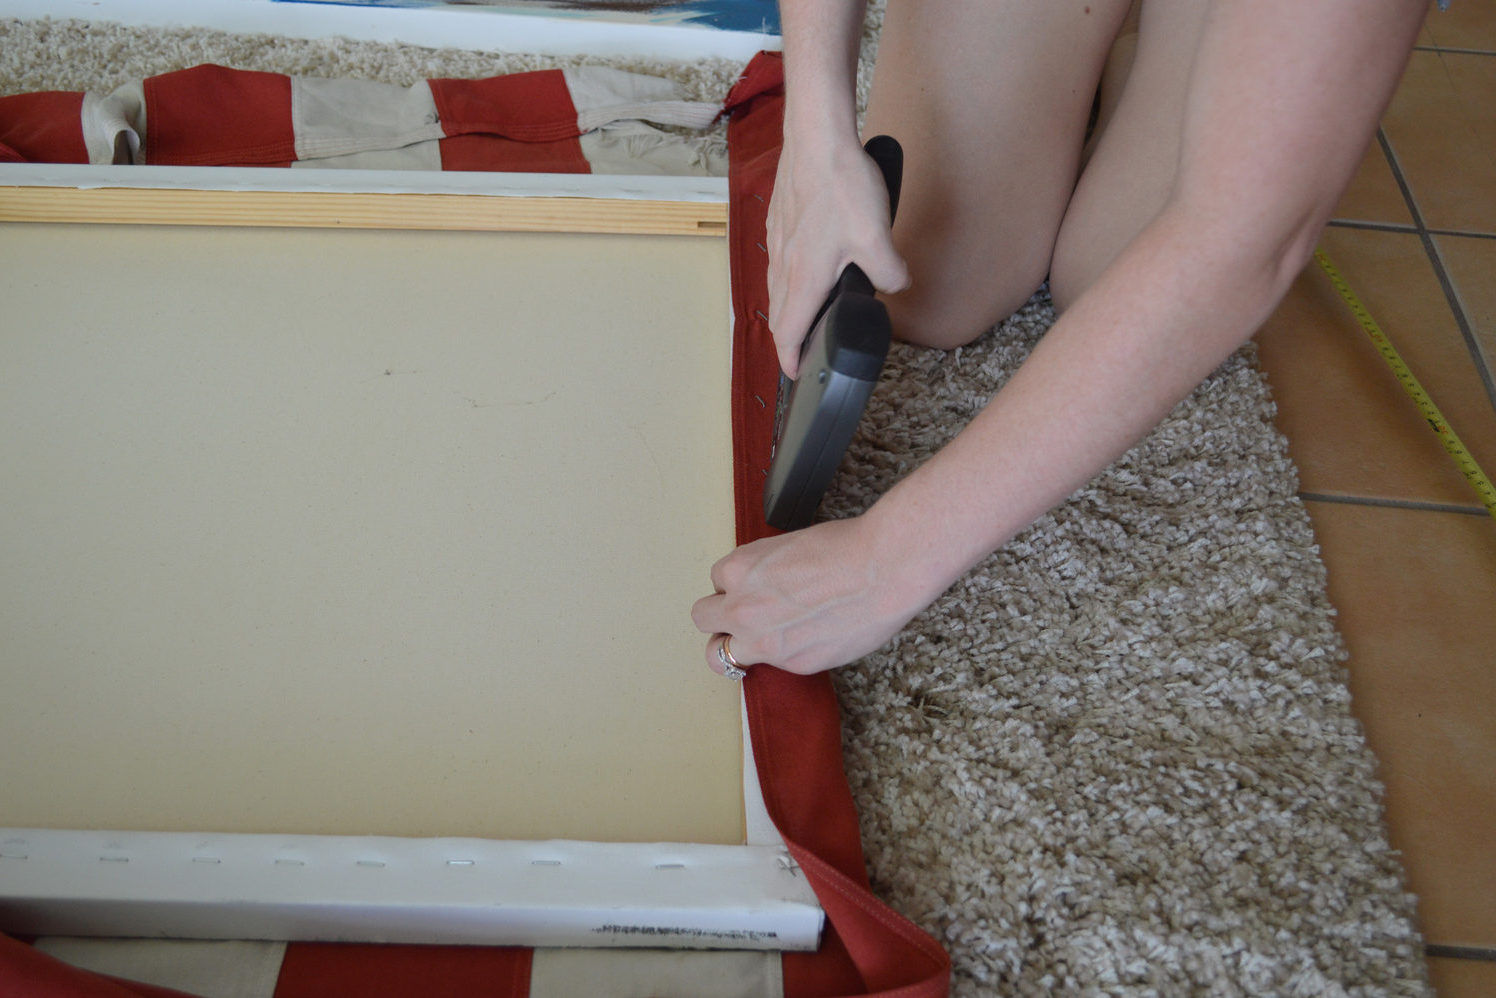
Make sure the stripes are level. I started staple gunning from the top. I lined the top seam of the flag up with the back edge of the canvas, this helped me make sure the stripes would be straight. I stapled down the right side, then the left side in order to get the tightness I desired; leaving the bottom edge for last. If you mess up, it’s no big deal. Breathe. You can pop the staples right out with a screwdriver and start over.
Repeat with Each Canvas
Once the first canvas was done, and we stepped back and had a look at it. We cut the rest of the flag off, as close to the staples as possible, while leaving a bit of room to keep the staples in place. We didn’t want to waste ANY of the flag.
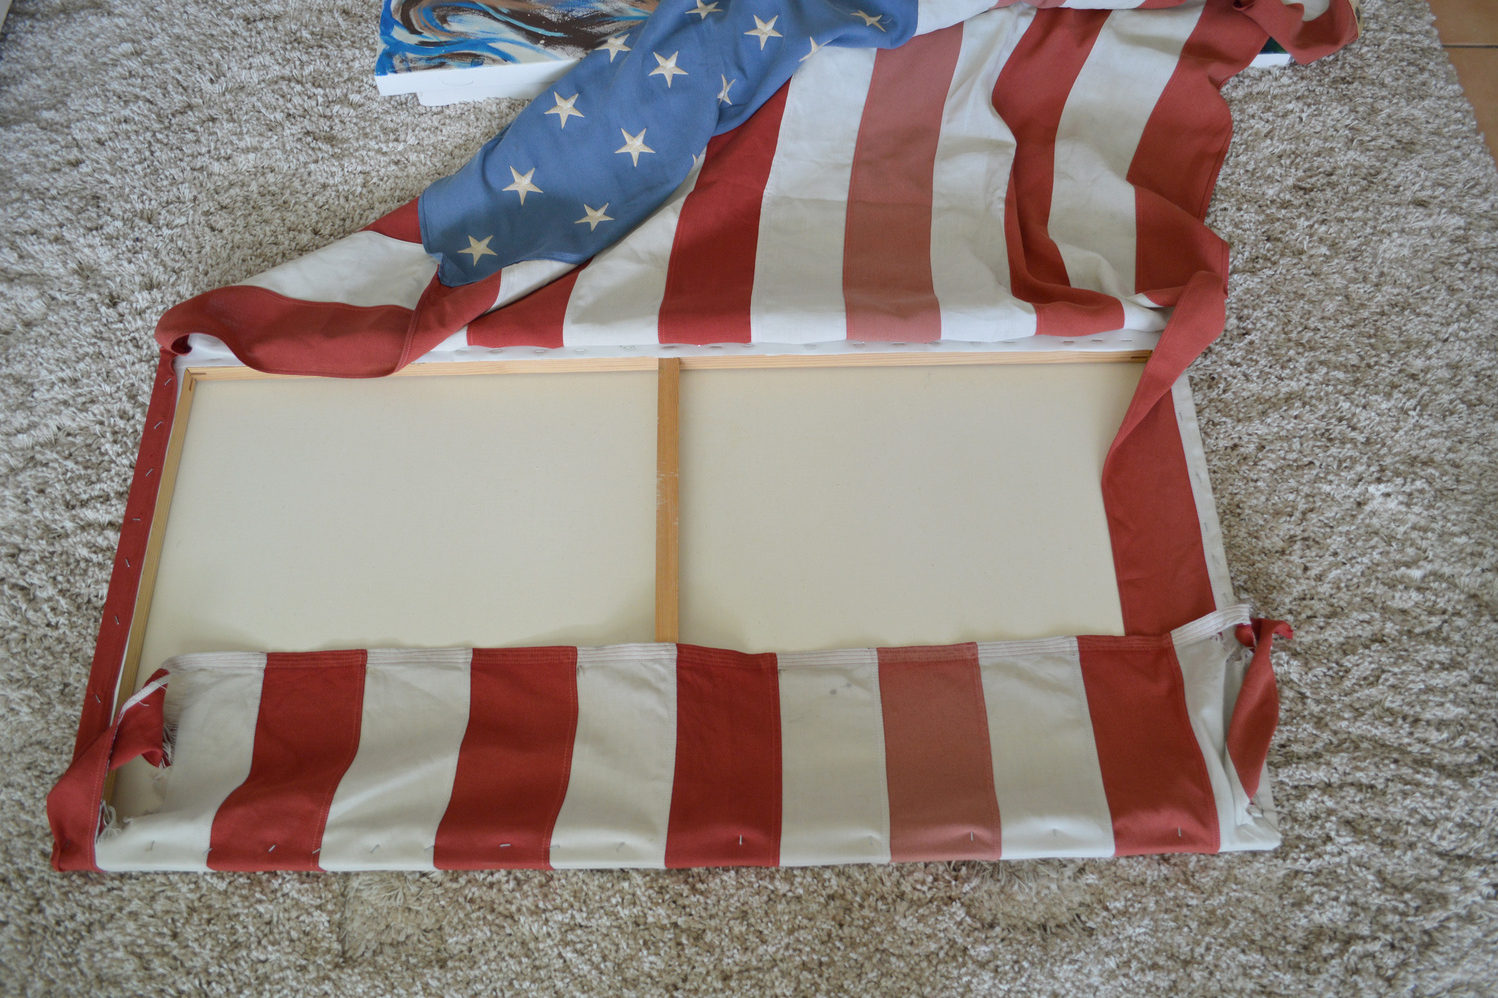
Next, we laid the rest of the flag, still face down, on the ground and placed the 2 remaining canvas’ on top. Again we did the top edge first, then the far right, then the far left. THEN we cut down the middle between the 2 canvases and worked on them individually.
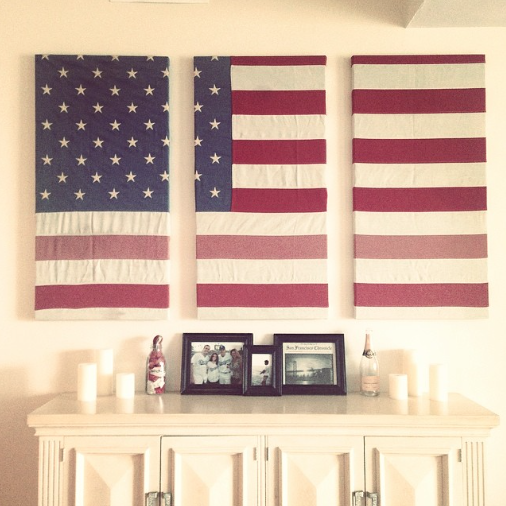
Time to Hang Your American Flag Art
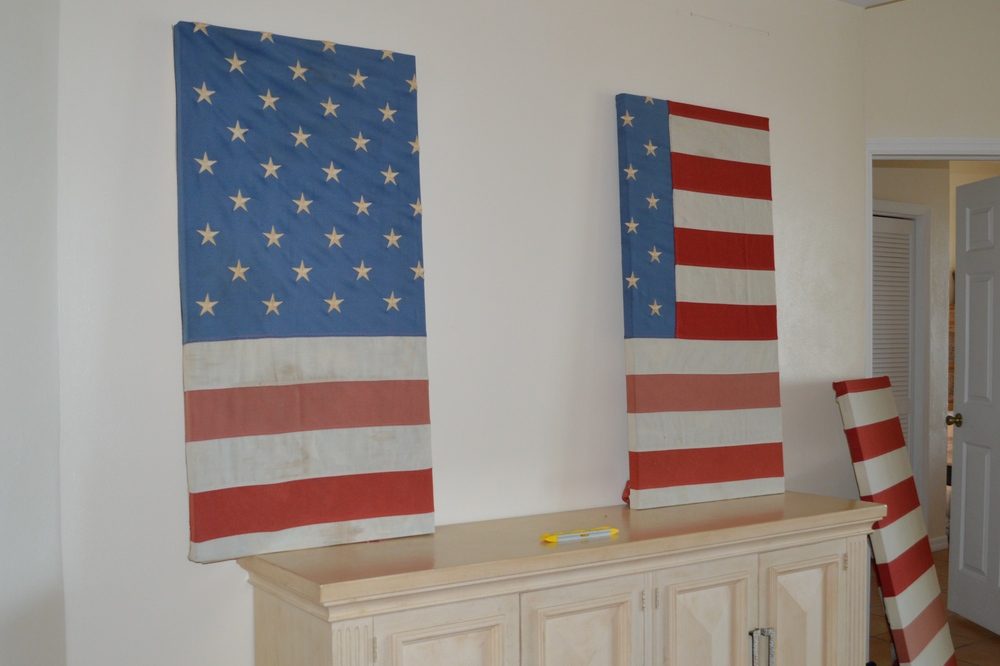
Once the canvases were wrapped, we measured out the wall for the drywall screws. Make sure to use a level! I propped the canvases up on the buffet to check spacing before securing the screws. The great news is that canvases will slide. as long as you have 2 screws level in the general area, there will be room to move the canvases a little left or right.
The extra bits & pieces
Once hung, I took all of the American flag pieces that had to be trimmed off and put them into a mason jar. I refused to throw away even a centimeter of it in the trash. I always loved the extra touch on the counter too.
There you go. This is one of the number one complimented pieces we have had in any of our homes. This American Flag art moved from the living room to a guest room, to another guest room. Everyone asks about it without fail.
How To Dispose of The American Flag Correctly:
Don’t want to keep the extra pieces or ready to move on from your flag art?
Many government buildings have disposal boxes in their lobbies leading up to June 14th (Flag Day), and several Veteran organizations hold burning ceremonies on The 4th of July.
If you aren’t near any of those options, you can technically burn the flag yourself. The flag should be put over the fire all at once to burn in its entirety. Leaving no pieces. While the flag burns you are asked to say the Pledge of Allegiance and give a moment of silence. *Please follow all safety guidelines and check your local fire/burning rules. Make sure your fire is fully put out before walking away.
The nonprofit Stars For Our Troops will also take flags that are of possible hazardous material (not safe to burn). They will cut the stars out of the American flag, and send them with a special note to Veterans; thanking them for their service.