When we were house hunting for our first home, Jeff’s major rule was that the house had to be above grade. He said it nonstop. Fast forward to buying this house, we had 100% forgotten that rule.
We moved in during the early winter, ignoring the thick leaves covering the yard left my the previous owner. “We’ll get to that next.”
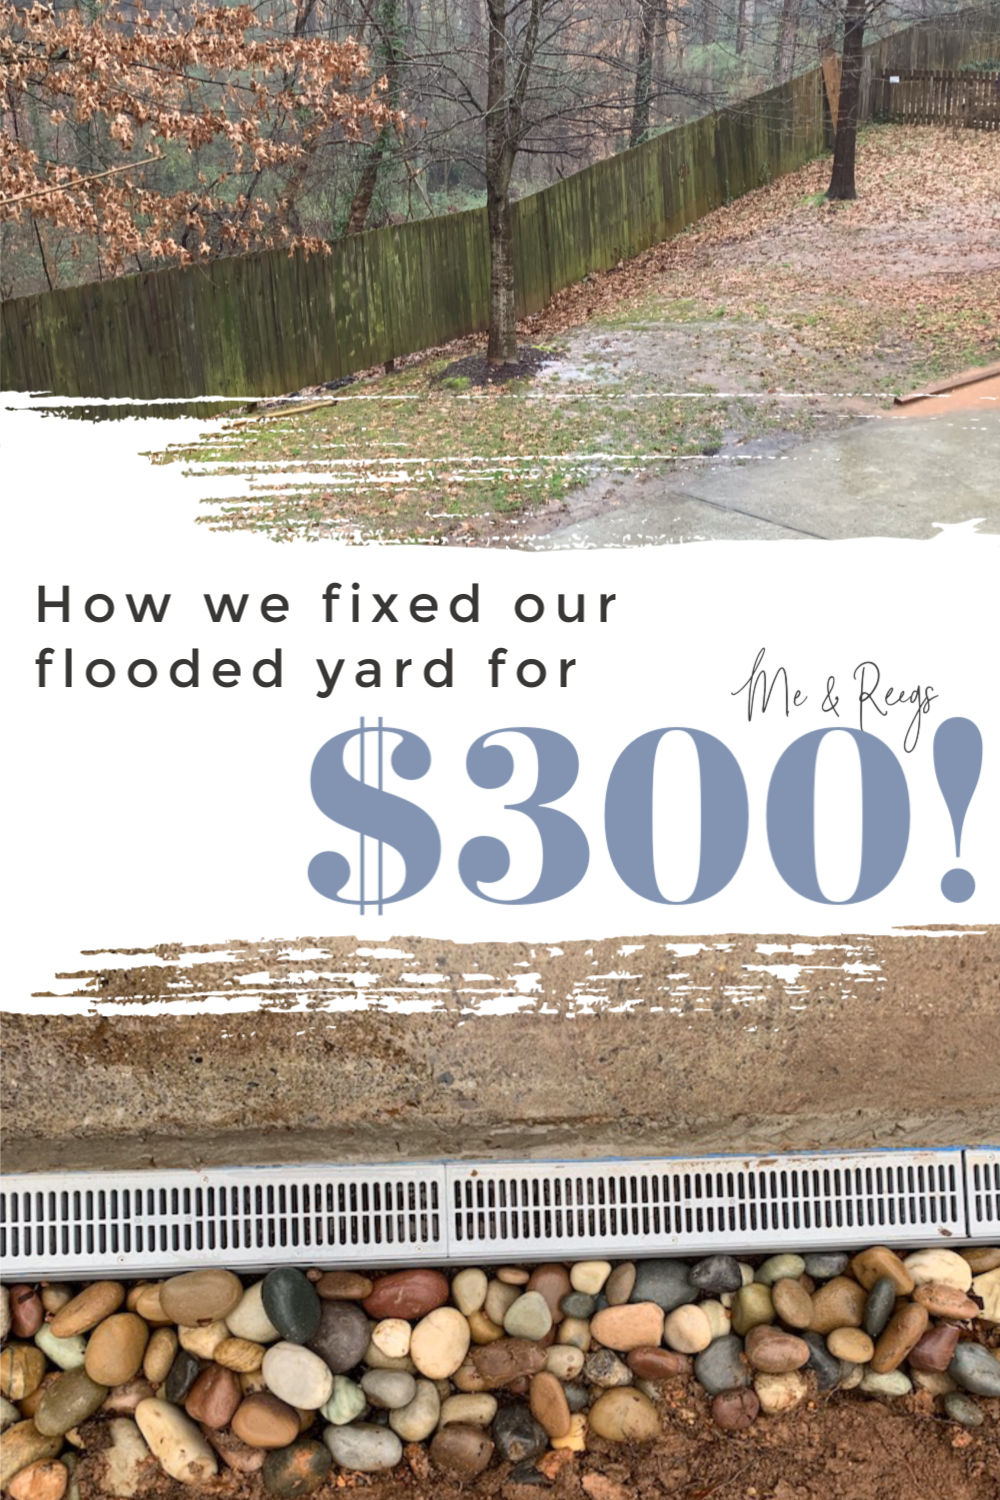
When we couldn’t take being “that neighbor” any longer, and felt moved in just enough to focus outside; we raked the leaves back to find we were leaving in a mud puddle.
If you have been paying any attention to the weather channel, you might know that Georgia has had rain day after day after day for what feels like months. And with even a drizzle, a now undisguised river would form. Water flowing and carving through the yard, and rushing down our driveway into a lake of a yard. Offsetting a lack of sleep in our house.
We called in quotes ranging from $2,000 to 7,000. Um, no thanks. Enter the need to DIY a driveway drain ASAP. We spent nights deep-diving YouTube DIY channels. We focused our viewing parties on “driveway channel drain systems”. The trenched-in channel drain took one morning and has saved us several headaches over the last year. For $300, it was worth the half-day of work in the yard.
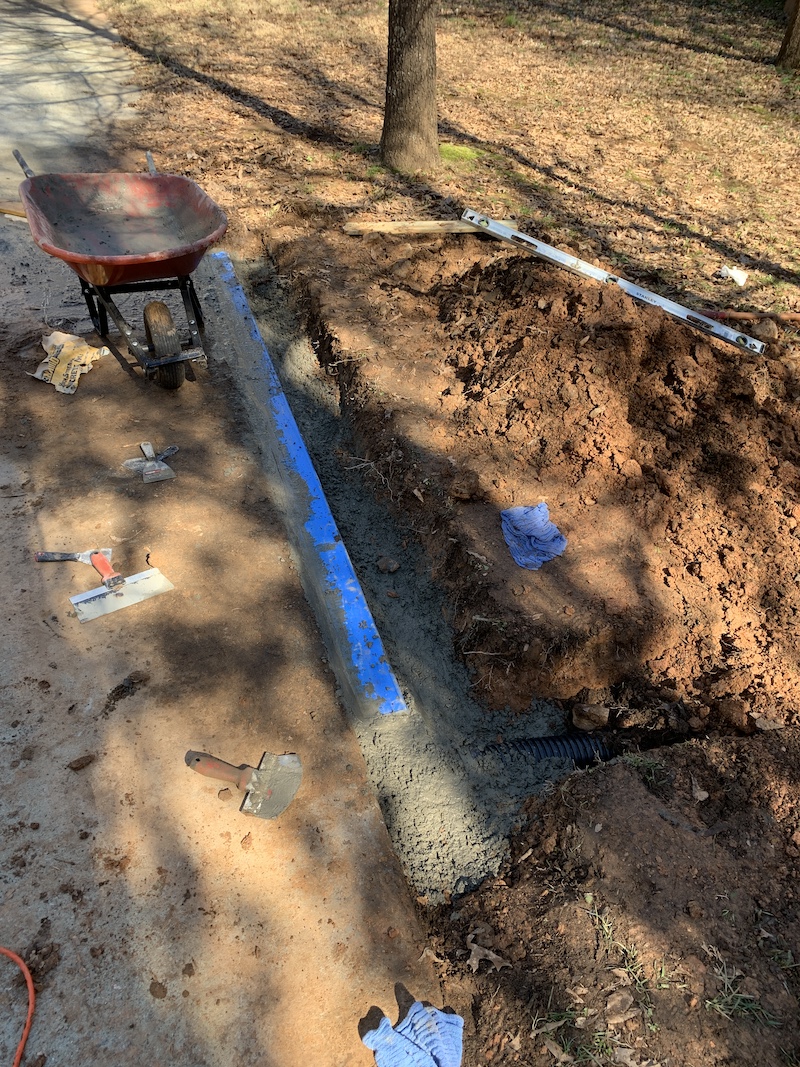
Before…
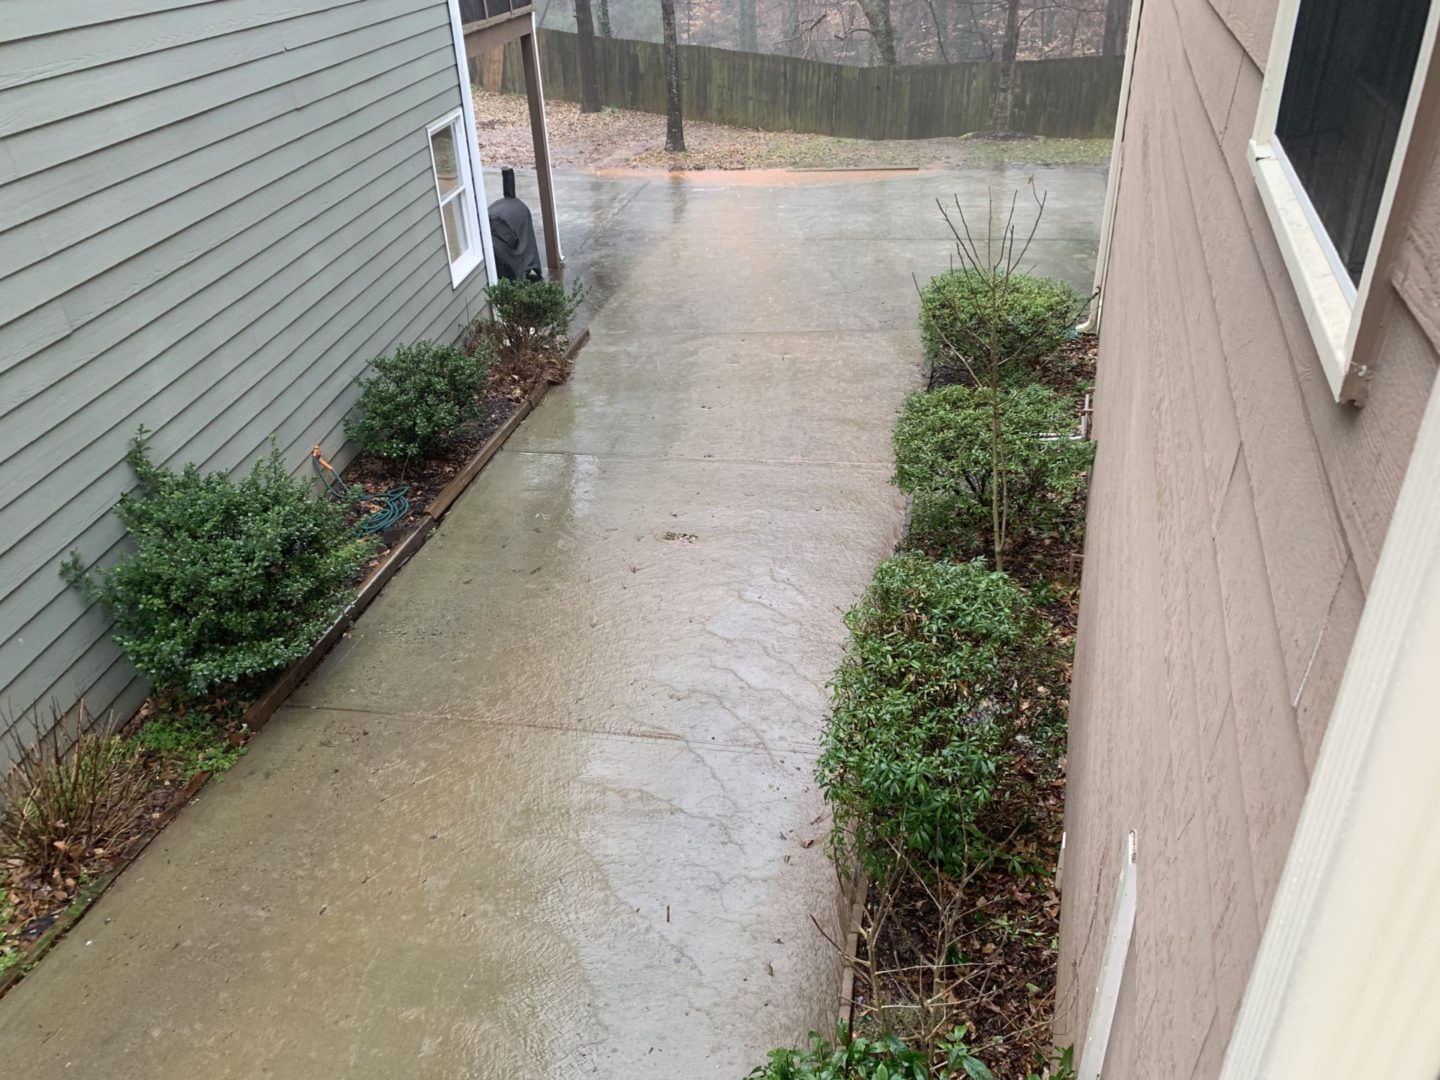
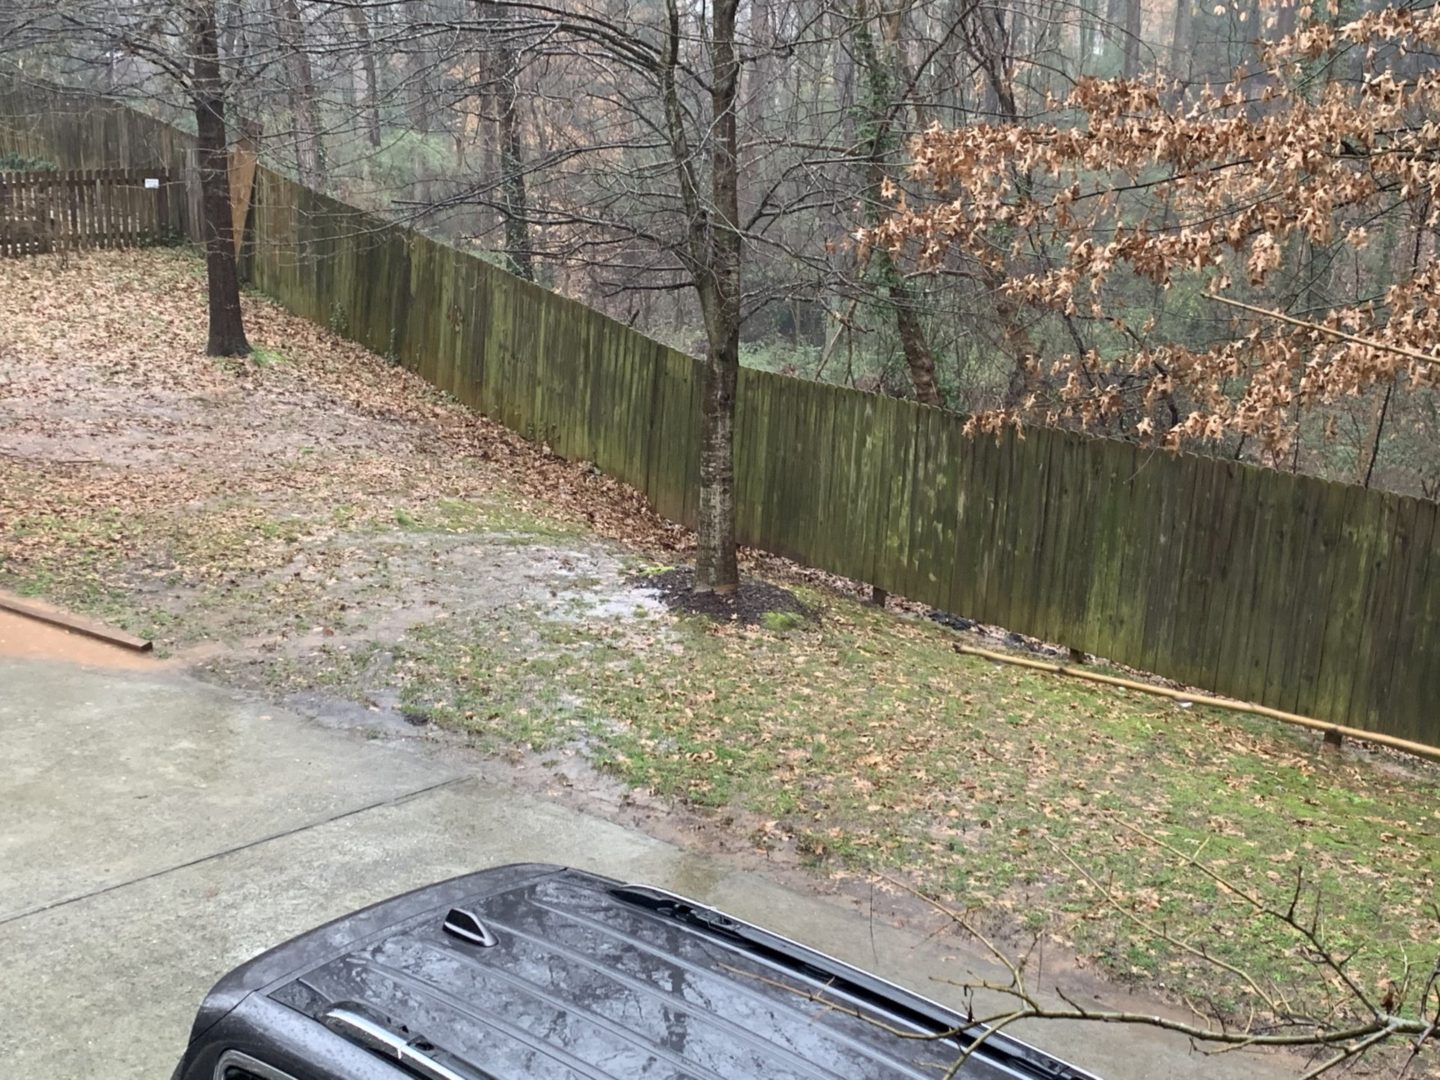
Look at that water flowing down the driveway like a slip and slide.
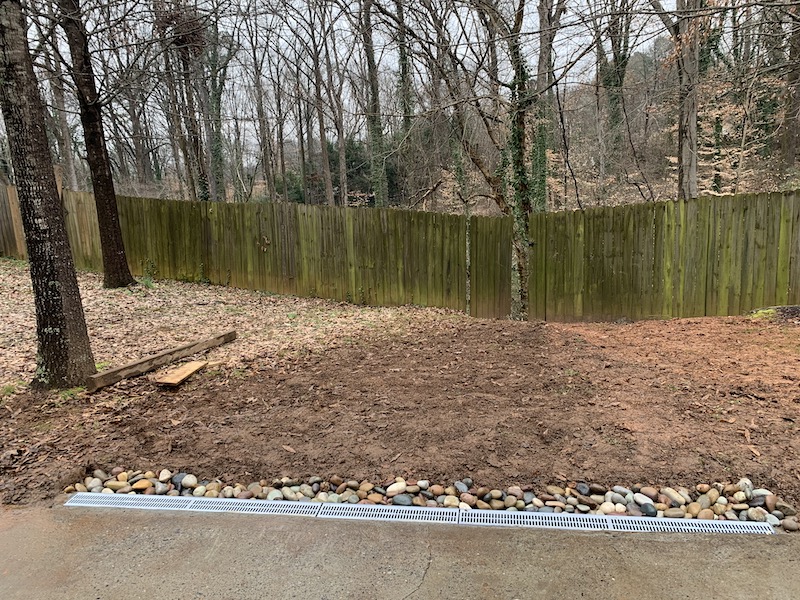
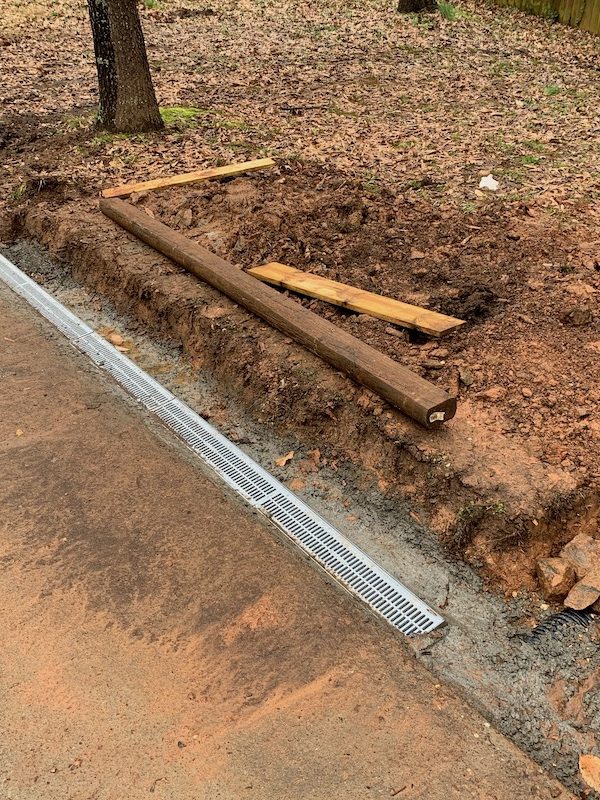
After…

Note: Our backyard sloped down more than 7.5 inches from the drain so our pitch is much more aggressive and follows the lines of the yard. You may not need to be as aggressive with your driveway drain.
____________________
What You’ll Need to Install Your Channel Drain
____________________
- 10 ft channel drain
- 4″ flexible pipe
- PVC Elbow
- Concrete Trowel
- Shovel
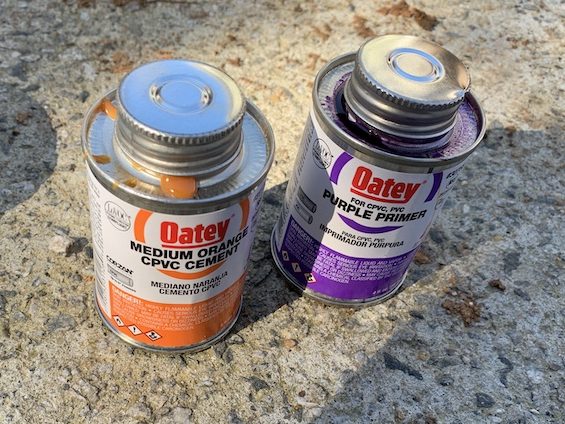
- PVC Glue Set
- painters tape or masking tape
- Channel Drain End Outlet
- Channel End Cap
- Corrugated Pipe Adapter Hub
- all-purpose gravel (We used 4 bags)
- concrete mix (We used 4 bags)
- River Rock (We used 7 bags)
____________________

Tools We Already Owned
- Wheel barrel (or bucket to mix concrete)
- Spade Shovel
- Trenching Shovel
How to Install a Channel Drain in Your Yard:
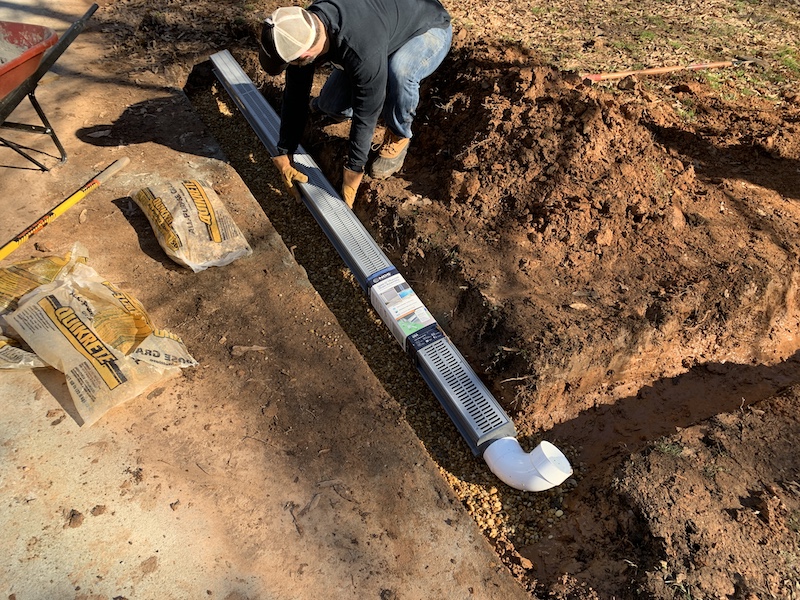
1| Locate the middle of the low point of the puddle. This can be done by rolling a ball down the pavement (when it’s dry out) and when it stops is the lowest point or close to the lowest point. You want the middle of the drain to be at this low point.
2| Set the channel drain where you are going to dig. You will need to dig a trench for the drain, at least 2-4 inches larger than the drain on all sides (left, right and bottom).
**Critical Point: You want to make sure the drain is angled or “Pitched” approximately at 1/8 – 1/4 inch per foot. So on a 10-foot drain, the side where the water will discharge should be about 2 inches lower than the side that is capped off.
3| Lay out the flexible 4″ pipe where you want all the water to drain.
4| Dig a trench where you will place this flexible pipe. Again, this trench should be dug 2-4 inches larger than the flexible pipe.
***Critical Point: You want to make sure the drain is angled or “Pitched” approximately and 1/8 – 1/4 inch per foot. So in this application with approximately 30 feet of pipe, the pipe is dropping 7.5 inches from the channel drain to where the water will discharge.
Points 2 – 4 are by FAR the most critical in this. I can’t stress this enough. Without proper pitch, the water can back up and plug the line.
4| Once you have completed digging the trench. Place 1-2 inches of concrete gravel in the trench where the channel drain is going to be set (the amount of gravel will depend on the space). This will help you establish the proper pitch along with the digging already done. Temporally set the channel drain in place. Use a 4-foot level to adjust this pitch. You will want the drain to be set 1-2 inches from the driveway. The drain should be approximately ½ inch lower than the driveway on the end you capped off. This will mean the other side where the water will discharge should be about 2.5 inches lower than the driveway.
__________
Assembling the Channel Drain.
__________
5 | Remove the channel drain from the trench.
6 | Use PVC glue to glue the solid end on one side of the channel drain and use the PVC glue to glue the discharge end to the other side.
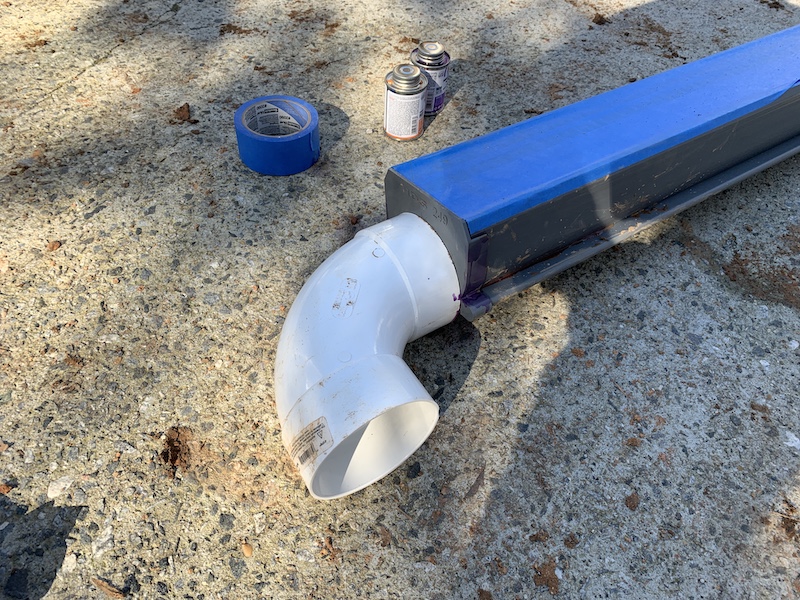
7 | Once the two sides are glued, use masking tape to COMPLETELY cover the channel drains grate (this will protect it from concrete later on). Once both ends have been glued, replace the channel drain in the trench and check for proper pitch again. Adjust the gravel as needed to establish the proper pitch.
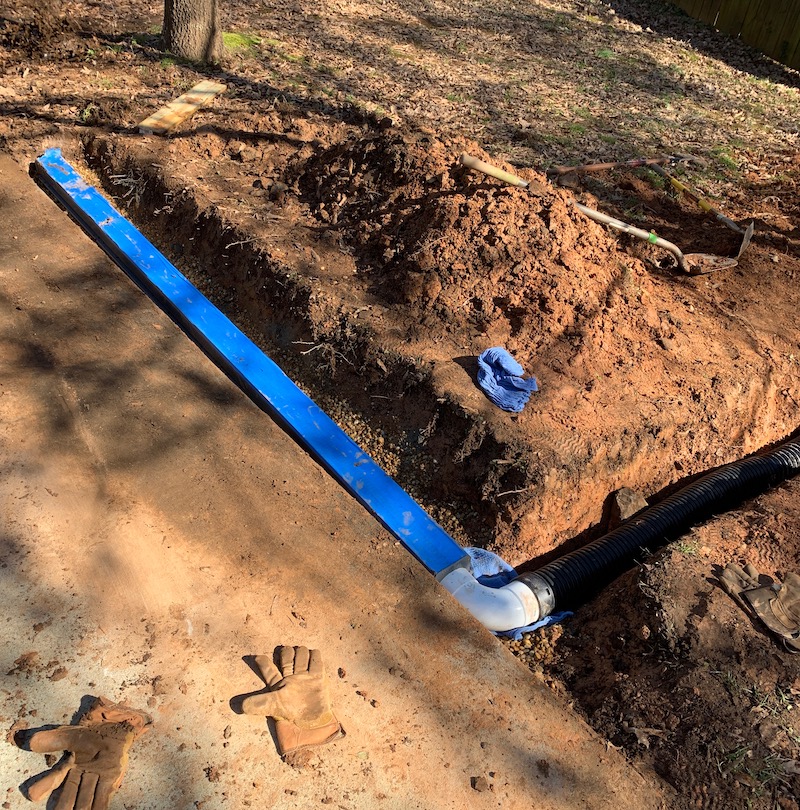
8 | Once the proper pitch has been established, place the 4-inch 90-degree adaptor on the channel drain, adjust the angle so the water will flow easily from the channel drain to the drainpipe (somewhere between 30-45 degrees from the parallel point of the channel drain). Once you are happy with the angle of the 90 adaptor use PVC glue to glue it in place. Then attach the corrugated pipe adaptor to the end of the corrugated pipe by snapping it into place. Then used the PVC Glue to attach the 90-degree adaptor to the corrugated pipe adaptor. At this point, you have completed the drain system.
__________
Time to Concrete the Channel Drain in Place!
__________
9 | Mix the concrete one bag at a time so you don’t mix more than you need. Also, one bag at a time will be much easier to mix than several bags at a time. You want to mix the concrete to the consistency of chunky peanut butter.
10 | Place the concrete on either side of the channel drain including any voids below the drain. This will lock the channel drain in place so it will no longer move. Fill in the void between the channel drain and the driveway. Make sure this void is angled up towards the driveway. This will become easier as the concrete begins to set.
***Critical note: As you are setting the concrete in place use your concrete trowel to poke the concrete to remove any air bubbles that may have settled in the concrete. If you don’t do this, the concrete can crack once hardened.
11 | Over the next 2 hours or so, you need to continue to check this concrete as it sets up to make sure the void between the driveway and channel drain is maintaining its angle and is being smoothed out. The concrete will continue to set and cure over the next 24 hours.
12 | You can now backfill on top of the corrugated drain pipe. Use the dirt you dug out to find in your trench, but don’t backfill over the concrete yet.
__________
The next day...
__________
The masking tape can be removed from the drain. You can either backfill up to the channel drain with the dirt or you can fill in the trench, as we did with river rock. We choose the river rock option because we think it looks nice and this will keep the loose dirt out of the channel drain.
***Critical Step: Wait for the next rain and be proud of your engineering marvel.
__________
Cost Breakdown for our Driveway Drain
__________
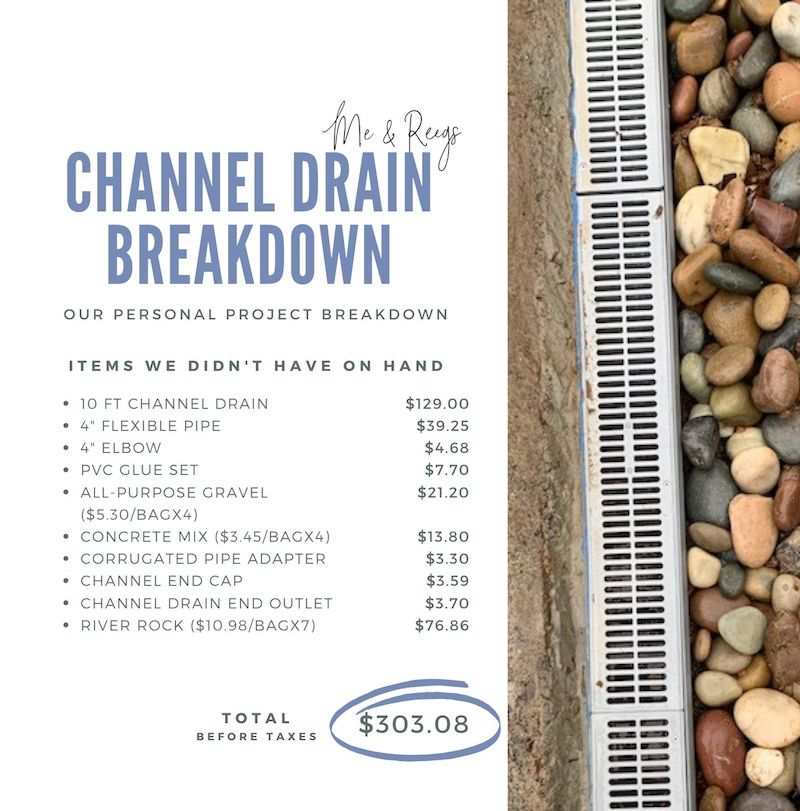
__________
Similar Posts |
- Stripping Painted Cabinets (or wood furniture!)
DIY Painting Cabinets
Industrial Curtain Rod DIY
- Brass Chandelier Make Over
- DIY Fireplace Bench Cover
- Chalkboard Wall
- French Door + Transom Installation with Home Depot
Social Links:
Facebook | Instagram @CandaceCottet | Pinterest
Don’t forget to Pin and Share!